Putting it all back together.
by Darren on Sep.15, 2013, under Seat
The Ibiza had been up on stands for months. Actually, over a year, if I’m honest. Life has got in the way for the most part, but in addition the heavy rain at the beginning of the year meant I didn’t do much on the car for several months. However, over the Summer I finally got everything back together – the gearbox eventually got built, despite several problems:
1) The diff from Gripper took longer than expected to arrive; it was a month after the original date that they actually had them in stock, although once they were it was delivered in days, set up to my preference!
2) The gearbox rebuild parts were a LOT of grief – I ordered several parts from autogear.co.uk and many of them were wrong; the bearings mostly were OK, but not all of them – the diff bearings were wrong, and the oil seals were the wrong size (more on this later), and they sent a 3rd gear synchro which didn’t fit; it looked about right until you took a close look, and this was a problem exacerbated by VW saying these parts were no longer available. Fortunately Jim Jones had an 02A box that had suitable parts in it, so I had a decent set of synchros at last. It didn’t help that Royal Mail lost the synchros I returned so I’m currently £50 down as they’ve not paid out on the insurance claim yet, months later!
3) Cleaning the cases out took a lot longer than the Skoda ones as they have a lot more places for grit and gunk to hide. While they look great after being blasted, it is a LOT of work.
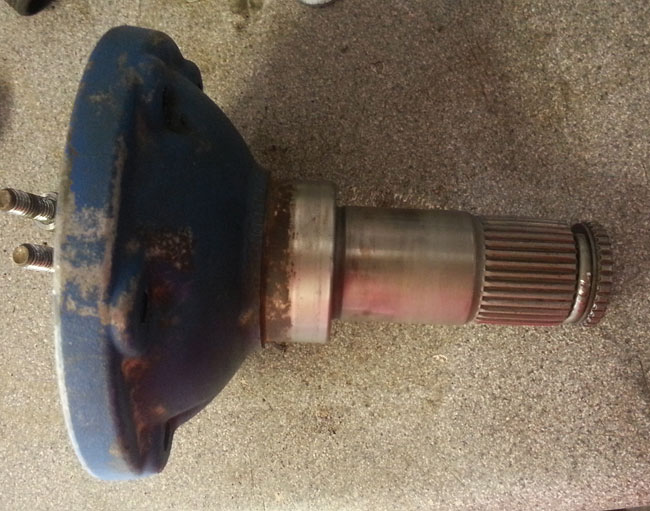
Actually building the box was pretty easy as the VW manual is very good. What wasn’t good was my lack of knowledge of VW driveshafts and flanges. I was unaware that there are two types (push-in and bolt-in) and I had the wrong type (push-in) for the gripper diff, and in addition the cases use different seals and a spacer if you have different flanges. Getting hold of the right ones for the diff proved hard, so instead I had my current ones modified by Retel EMD – Damian has provided most of my modified parts, and always does a great job, so here’s the article in question:
Flange
The bit to the right needed to be removed (the spring clip and the small splined bit), as well as a hole drilled for the bolt to go through the centre. Apparently this flange is made of incredibly hard material and it was bloody hard work to get it done…. but there you go! Once all modified and with the right seals, it bolted up without issue. Splendid.
Now it was finally all together and ready to bolt to the engine and then drop into place:
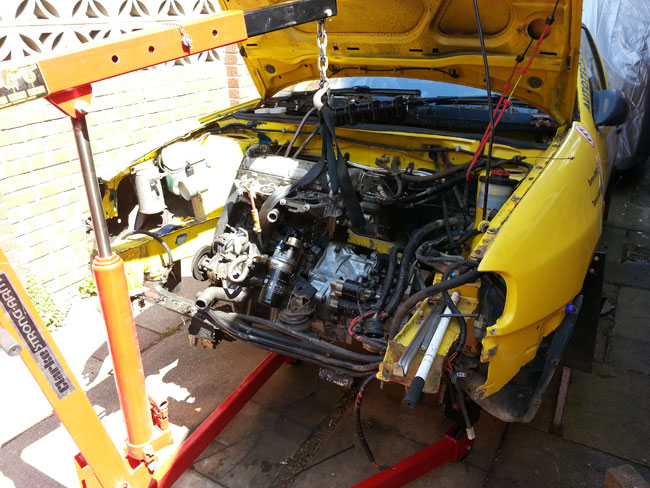
In it goes!
Fitting it here was easy enough – particularly with the removable front panel – but getting the mountings in place was fun – the gearbox mounts are quite complex (it looks as if VW made a bunch of odd bits to make the mountings, it’s a bizarre jigsaw) and I didn’t pay much attention to them when I took them apart… over a year before. An hour’s head-scratching and finding a missing part led to it all being in place at last. Splendid.
Next, it was time to sort out the issues of cooling that it suffered – the radiator issues have been mentioned before, but there’s the plumbing to address for it, and that’ll be next.
So, is it bent or straight?
by Darren on Sep.15, 2013, under Seat
Last time anything of significance was posted on here, it was about the front subframe and suspension – the camber of the left front was wrong, and it was hard to measure what was wrong and where. However, with more investigation and measurement the truth finally made itself clear – the car itself wasn’t bent, but the front hubs had been modified to counter something (I know not what) and as a result were actually off; fitting one from one side to the other had a different camber on it. Given this and my wish to fit the Proflex suspension I had to the car led me to trying to combine the two projects (get the angles right and fit Proflex) into one – fit the Proflex and sort it while doing that. To that end I designed some adapters for the suspension to fit the Proflex to the Ibiza’s hubs. Long story short, I got them made up, had some plates made, measured and made some final ones with a bit of negative camber dialed in as well; after all, this is a rally car, not a daily driver, and a bit of camber will sharpen up the front and with the power steering it won’t mean I have a handful to drive. The end result of all this work (and some welding by someone else when I realised my limits on 6mm thick plate) was this:
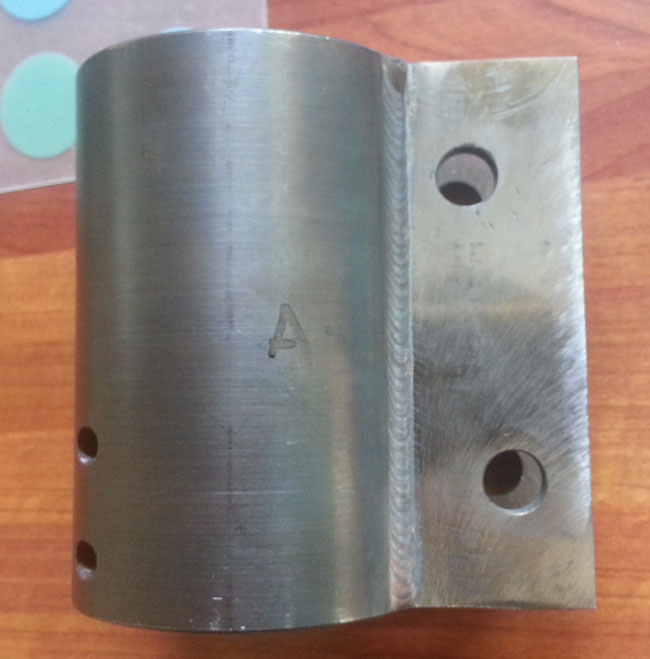
Front adapter for Proflex
This will go round the pin-type Proflex and bolt the hubs to it. Once I’d got new hubs, suitably modified and with new bearings fitted, it all bolted up OK, and when fitted (actually much later in the story overall, but you get the idea), it looks like this:
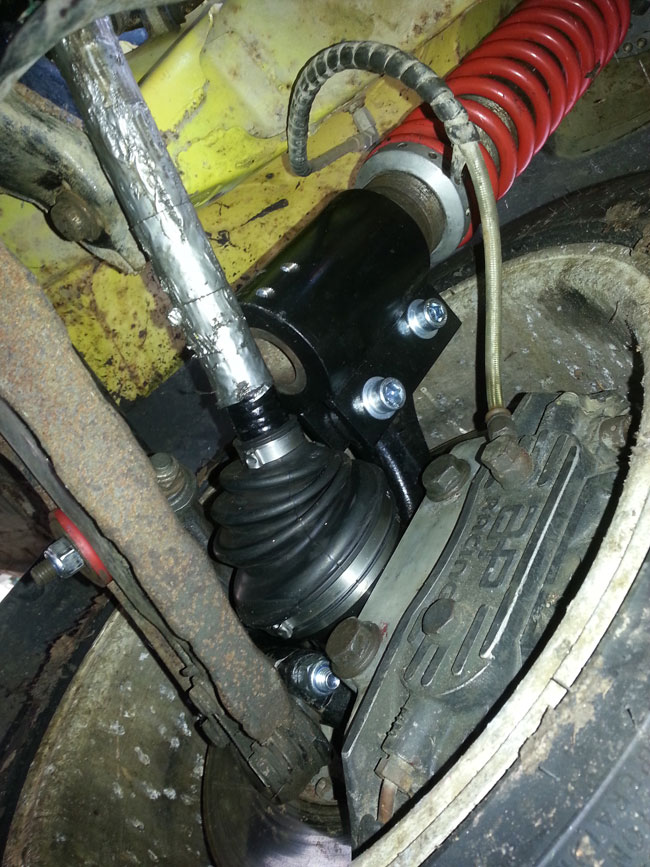
Nice and shiny… for how long?
The car now has about 1.25 degree of negative camber on the front end, and the same figure on both sides – there was over a degree of difference between one side and the other before, so it will hopefully be a bit better behaved!
In addition to this, the rear has had Proflex fitted as well; this was a much more straightforward addition as it just involved unbolting the rears, and drilling out a spacer – that was it, as most VAG-group cars seem to share similar dimensions, and the rears of the Ibiza and Felicia are almost identical. Only the remote canisters needed a mounting and they are snugly fitted in the rear beam, with enough slack to ensure a re-run of day 2 of Rally GB 2010 doesn’t happen! I really didn’t like the feel of the Bilstein suspension that was fitted to the Ibiza originally – the rear in particular was very lacking in grip – so I hope that the tunability of the Proflex will give an improvement in this area. Time will tell…
A long break…
by Darren on Sep.15, 2013, under Seat
It’s been a VERY long time since anything has been posted on here, but that doesn’t mean to say I’ve been idle – far from it, in fact. Lots has happened, and over the next week or so I’ll be posting on what’s been going on. In short, the car is finally back in one big piece, and by the end of the week I hope to have it on the road, MOT-ed and ready to shakedown; Rallye Sunseeker is on the 19th October, and I want to be taking part in it.
Straight?
by Darren on Mar.14, 2013, under Seat
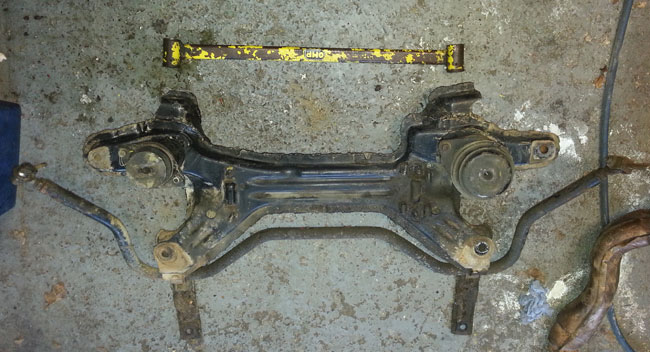
So, the subframe arrived, and it was complete with steering rack, wishbones, anti-roll bar, the lot. A bargain for £53 delivered… It took a while to get it all apart, and there are some differences between the golf and Ibiza setup – the subframe and rack are the same, but the wishbones are different as they have a different ARB mounting, and the ARB itself is obviously different – doubly so as the Ibiza has a heavy duty Neuspeed item fitted, not the standard item, so all of that lot can go in the scrap bin, ready for the next “guess how much this will weigh in for” competition on Facebook.
Anyway…. once it was all apart, it was time to measure up. What I was hoping for was that the new subframe would be wider at the front mountings than the current one, and that I’d be able to make mods to the new one (the old one had been strengthened and seam welded), bolt it on and away I’d go.
It wasn’t to be. I measured it, and found that they were the same. Measured again, and again. No difference, still the same measurement.
Oh dear. It wasn’t that. But there was definitely an issue, so something had to be wrong. Lots of measurements were made of the location points on the shell – now obviously I don’t have a complex jig or 3D measuring gear, but diagonals should be the same, and they were… which was odd. So after a couple of hours I decided to bolt the subframe back in place, refit the wishbones and see what happened.
And it’s all fine. The only thing I can think of is that an impact made the subframe move relative to the mounting point (there’s some slack in the mountings) and that was the problem. With them bolted up in place, it’s all as it should be. Which is nice, aside from my modification of the front hub meaning I need a new one, and not knowing what hub it actually is – it isn’t a Golf one, as I’ve now found out…. the hunt continues!
Bent!
by Darren on Mar.05, 2013, under Seat
I’m not sure if I mentioned this….but the Ibiza is bent.
It always has been. The camber on the front left wheel is positive – that means the top of the wheel is tipping outwards – which has a really bad effect on the car’s handling. Or rather, it was that way until I modified the hub to allow it to be at the correct camber, but the problem with that is that the wheel is not in the right place. My rough and ready calculations showed that the wheel was about 5mm “in” from where it should be, and that pointed to two areas – either the upper mounting was out from where it should be, or the lower one was in. As the engine and gearbox are out of the way, this seemed the ideal time to investigate, as it’s actually possible to measure between strut tops and wishbones without there being a lump of metal in the way, so I made some measurements and found that the diagonals (i.e. top left strut mount to bottom right wishbone, and vice versa) were different. By about 5mm, and in the “right” direction for the error I’d seen. The top mounts are massively strong on the Ibiza – they were fabricated from thick steel sheet, welded to the cage accurately (Simon told me that this was a major pain to get right when the car was built) and they looked unlikely to have moved much; inspection didn’t reveal anything untoward. The lower subframe, however, would be susceptible to loading from the side (such as sliding into a kerb), and was relatively weak as the subframe hasn’t got a direct line between the two mounts (as the engine is there). There is an OMP brace fitted, and looking at this showed…. that it’s bent, and on the side where I think the car got hit.
It was all pointing toward the front subframe being bent, but it’s difficult to assess – there are no easy points of reference, and its shape and construction mean that it looks sort of bent anyway – it’s quite an organic, flowing shape and is not symmetrical. I’m sure with an accurate 3D measuring jig it would be possible, but I decided to get it off the car anyway to see what was what, and when I undid the bolt nearest where I think it’s bent… it moved quite a lot, and I couldn’t get the bolt back in, so I think this confirmed it – the rest came off pretty easily; once the steering rack was unbolted, it was only another 5 bolts and off it came….
Is it bent?
It had been strengthened and seam welded, but it was still not possible to see if it was actually bent. A bit of research showed that as many people have said, the subframe is the same as a Mk3 Golf (GTI/VR6), and this has a massive upside – they are cheap and availability is good – I managed to get one for £50, delivered, including steering rack, anti-roll bar and wishbones, which should be arriving today. I can then measure the differences between the two (which I hope are present!) and if that all checks out, then get welding!
Gearbox fun
by Darren on Mar.05, 2013, under Build
OK, so last weekend I’d stripped the box and cleaned up the cases, but now it’s time to get serious. Firstly, the old ATB diff has been stripped of the crownwheel and bearings and put on eBay, so if you want one for an O2A box (fitted to a huge range of VAG group cars) then head over there to get yourself a bargain as they’re bloody expensive new!
Looking at the gear cluster, the ratios that are in there are the best choice from the standard sets available, and what is nice is that the final drive is a 4.61, meaning the car is geared much lower than standard overall – this looks to be an expensive item from the brief search I’ve made of online sellers of such stuff – around the £600 mark! I’d really like a close ratio setup as I had in the Skoda…. but the problem is that the only kits I can find are north of £1700, which is not an option at present, so it’ll have to stay standard.
Now, time to rebuild the box. Looking at the old bearings, all of them look heavily worn, possibly because they weren’t set up correctly – they all look to have suffered a lot of heavy load, and while not as bad as the diff bearings, they were all in need of replacement. Setting up the box is a case of installing new bearings to a shaft, fitting the bearings into the case, and then measuring the end play of the shaft. This measurement is taken with the desired clearance (sometimes a negative clearance so the bearing will be under some pressure), and then the appropriate shim is purchased. The input shaft was first up, so old bearings pulled off:
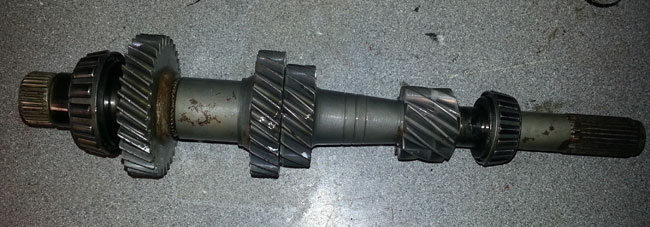
Shaft!
And then new ones fitted, and the shaft popped in place:
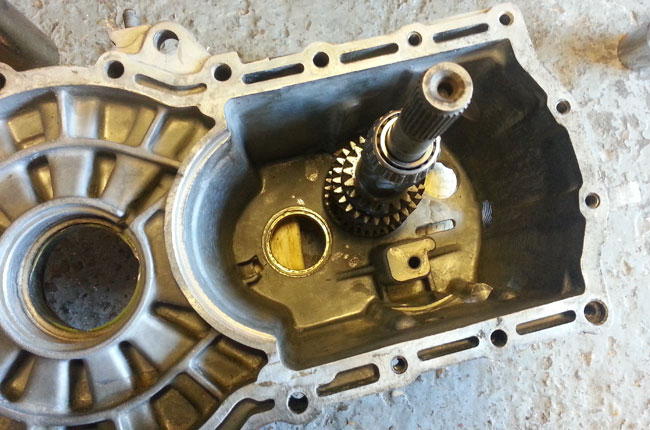
Shaft in his house.
Next, the casing was fitted and bolted up to the correct spec, and the end play in the shaft measured.

Casing in place, ready to measure.
Using the manual from VW I now know the correct shim I need for this shaft…. the problem I have is that I can’t go any further with the box now, for three reasons. Firstly, the next shaft needs a shim placed in one of the bearing housings to allow it to be removed (it’s in a blind hole, and without a shim behind there would be no way to remove it – it was a pig even with one in there). So I need to order that. But more importantly, I need to get a tool made up and a press to allow me to disassemble this shaft as it has three bearings, one of which is installed behind all the synchros. Once they’re all off I can set this bearing pair up and measure that.
The diff from Gripper…. has been ordered, but they are waiting for parts to arrive, so once they have them, I’ll be relieved of a load of money, and then I’ll have a diff that I can install and do the same procedure on as the other shafts. It’s just one of those jobs that will take a bit of messing about as there are several stages and special tools needed, alas! Still, it’s getting there… slowly.
Gearbox stripdown
by Darren on Feb.24, 2013, under Seat
Aside from wanting to change the Quaife ATB diff for a plate one, there had always been a problem with the Ibiza’s gearbox, and that was that it was very noisy – it sounded like a bag of ball bearings, in fact. The synchro on second gear was always a bit lazy (not helped by my poorly co-ordinated gearchanges on gravel!), so that would probably need replacing too. Now it was actually out, it was time to strip it down – something that I’d done some reading up about, and was a little concerned that there would be some potential problems on the way. Anyway, here it was, ready to come out.

Dirty box!
Stripping the first casing off was straightforward, but behind it was the pair of gears for 5th gear, and this was the potential problem – I’d read a number of horror stories about people chipping the gears, and I really didn’t want to do that; this meant being really careful and modifying my puller to get into the 1.5mm gap behind the gears. Out with the grinder, spent about 10 minutes getting it into shape and while trial-fitting one of the legs, I pushed it in…. and the gear moved! This was really good news as one of the gears came off without any issue at all. The news got even better when the other one came off just as easily. Splendid. Now it was just a case of undoing another 6 bolts for the inner gear pivots and then all the case bolts, and then…

The business end.
… all the insides were revealed. All looking good, and easy enough to strip down further – it looks a very sturdy box, and is far easier to take apart than the Skoda box was. There’s more work to set it up (both shafts and the diff need to be set precisely), but it will be much easier to put back together once that’s done, thankfully. Here are all the bits that had been removed:
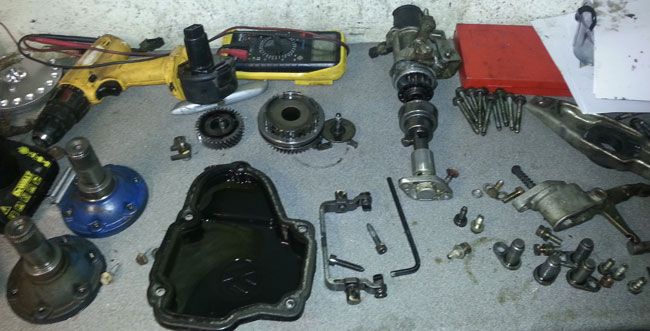
Where do all these bits go?
Driveshaft flanges, casing, 5th gear pair, selector, pivots and clutch actuator. All easy enough. They were bagged up, and then it was time to remove the gears and the diff, leaving me with a box full of bits:
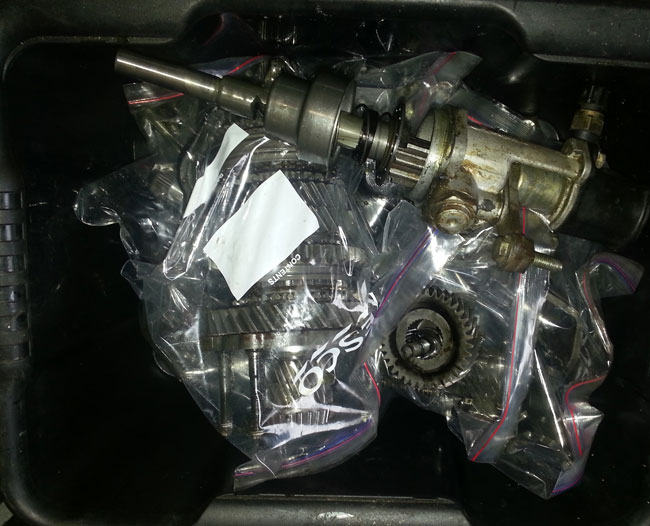
Box of bits. A gear box.
And also the Quaife ATB diff, which I will sell to help fund the purchase of the gripper plate-type diff.
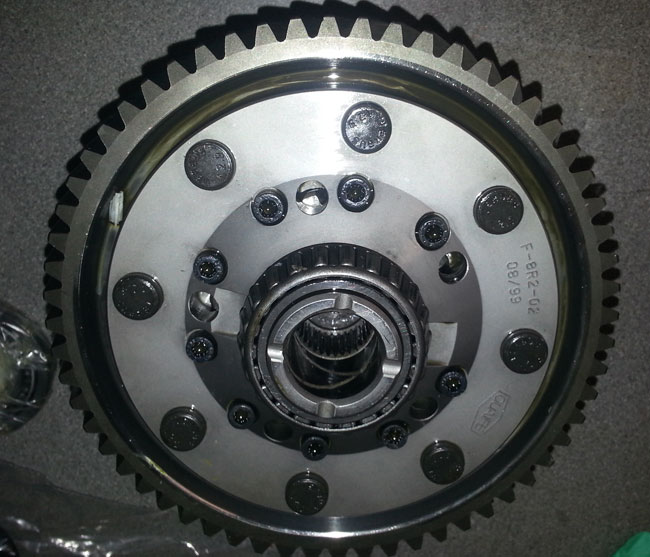
“The postman’s diff”.
Now I had a couple of empty casings, which needed to be cleaned up properly.
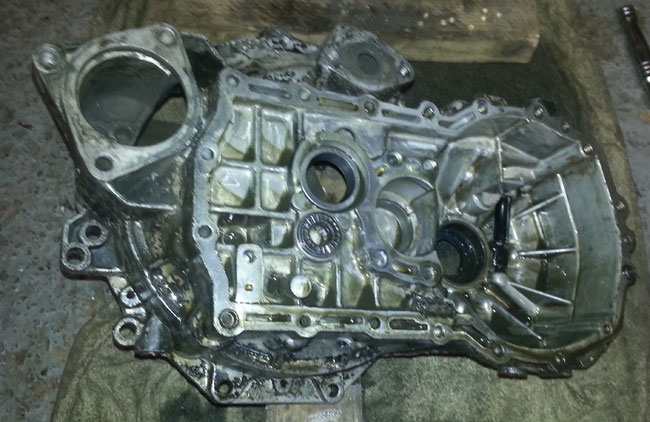
Empty casing of the gearbox.
This is not just for cosmetic reasons although the gearbox was painted at some point, badly and with some terrible paint, so it looked awful. When I did this with the Skoda gearbox, it also had the benefit of making it far more corrosion proof – it didn’t look bad after 3 years of use, so I’ll do the same with the bead blaster. All I needed to do was remove the bearing races, as I have a new kit of bearings to replace the old ones – some of them are unusual, so the 7 bearing kit cost a rather pricey £100:
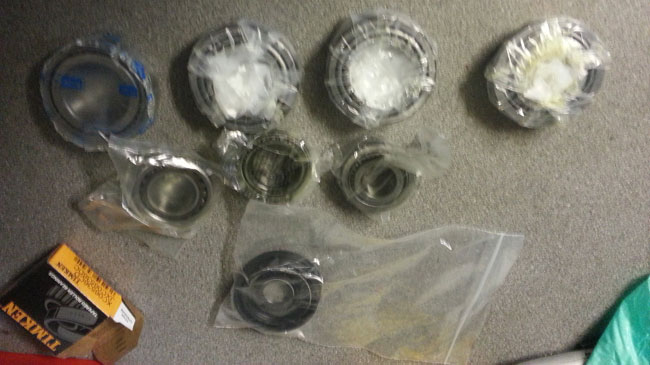
Shiny new bearings.
On removing the bearings, the reason for the noise became apparent – the diff bearings were about as knackered as any I’ve ever seen. I think the diff bearings may not have been set up properly, having too much load on them, leading to this:
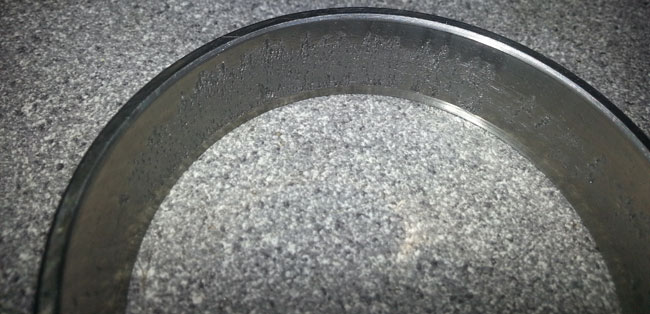
Rough as hell.
That bearing race should be perfectly smooth, and even in the rather poor photo above, you can see it’s anything but – both bearings were badly damaged, and this alone would have made it sound horrendous. This damage was confirmed by looking at the magnet in the gearbox that is there to retain the (inevitable) bits of swarf that are in a gearbox during its lifetime as the parts wear:

There’s a magnet in there…
It was completely covered in the stuff, mostly bits of the bearings that had broken up. Next up was the lengthy task of cleaning up the cases, both inside and out. Lots of cleaning, then bead blasting meant that this:
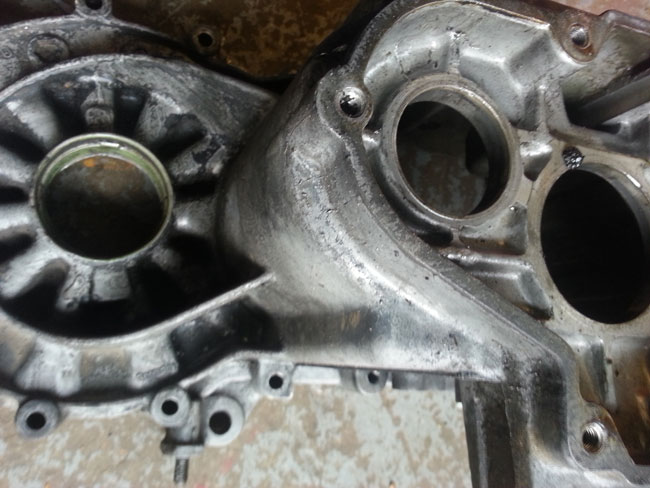
Dodgy old casing
Ended up looking like this:
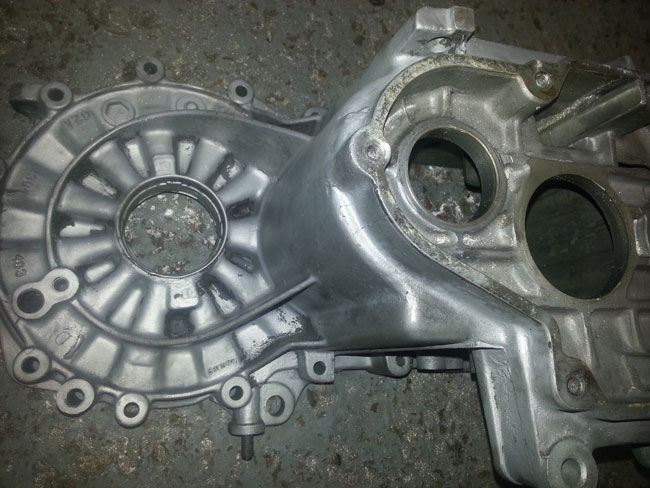
Nice and clean
It’s not perfect as my blasting cabinet is too small to be able to get to everything, but it’s way better than it was before, and also means it could be examined properly for damage, and thankfully none was found.
In other areas, the new (much larger) radiator was fitted today. The fitting really just meant moving the mounting bar down by 60mm, which thankfully didn’t mean any other changes. The radiator slightly obscures the oil cooler, but I will make up a duct to stop the air from the radiator passing by the cooler, and open up some space in the front panel to improve airflow to it. Here it is, fitted:
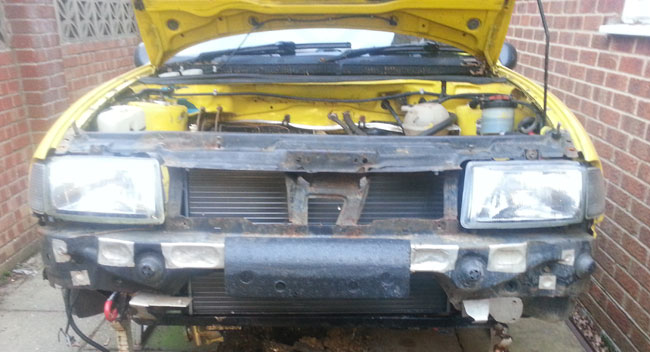
Much bigger radiator!
As you can see, it’s MUCH bigger than the original (about 1.4 times the area), so it should do the trick. A long day’s work, but at least the car is moving in the right direction. I’ll be ordering the LSD this week (no, not the drugs, although the thought has crossed my mind!), and hopefully making some progress with the driveshafts.
Gearbox Magazine
by Darren on Feb.05, 2013, under General
Regular readers (with long memories) will remember that I’ve been interviewed before by Brian Driggs for his excellent webzine, gearbox magazine. Brian was in touch a couple of weeks ago to see how things were going, and obviously it had been a while since we’d last spoken, so I brought him up to speed on what had been going on (or not) at Jones towers, and yesterday the article was published.

Best pun ever!
Brian is currently working hard on getting the magazine in print and while the physical magazine may only be for his side of the pond, it’s still an excellent read for anyone who’s interested in ‘real world’ motorsport stories, and is available digitally for not a lot of money. We live in an age where content isn’t valued as much as it could be, and good journalism and stories will become a thing of the past if projects like Brian’s don’t get support. It’s not that we need to fear the Internet or anything Luddite, but it is important that we start to value things financially that we value in terms of consumption, and pay a bit here and there for them. Sermon over!
Spot the difference
by Darren on Jan.27, 2013, under Seat
So, last time out, I’d just discovered that the Ibiza’s current radiator was much smaller than it should be. A bit of time spent looking on various online catalogues only increased the mystery, however, as the standard size of the radiator wasn’t immediately obvious – there were a few different sizes listed by manufacturers, some different by car spec, others just different anyway – for the same year and spec of car, the sizes were different! Looking on VAG-CAT (a site with original microfiche info on it) opened the can of worms further as it listed even more sizes, one of which was very much larger than the current one. The front end of N194 DKE has been modified with a support bar for the radiator, so I’m not sure how it would have originally sat, but I found one of the largest size radiators on eBay for only £40, so I thought I’d order it and see what gives – it’s not the end of the world if I can’t make it fit – and this thinking was reinforced by the quotes I had for bespoke radiators which were around the £500 mark. As a wise rally bod said to me – “That’s OK, but you need two as if one breaks you’re stuck”, and with that in mind, I think modifying the car to suit a standard rad is a better idea, especially if they are £40 a throw. I had worried that a wider radiator will obscure the oil cooler, but even the new, massive one doesn’t do this – the end tank is slightly in front of the edge of the oil cooler, nothing more. The bar that supports the radiator will need to be made again, but that’s OK as a) it’s a simple piece of steel tube with flat brackets on and b) it’s bent anyway.
Anyway, that’s about as much as I’m capable of this weekend, I’ve had flu (yes, proper flu!) all week, and feel as weak as a kitten, so here’s a picture of little and large to be going on with. Next weekend, with any luck, I’ll get the engine out and get to the gearbox at long last!
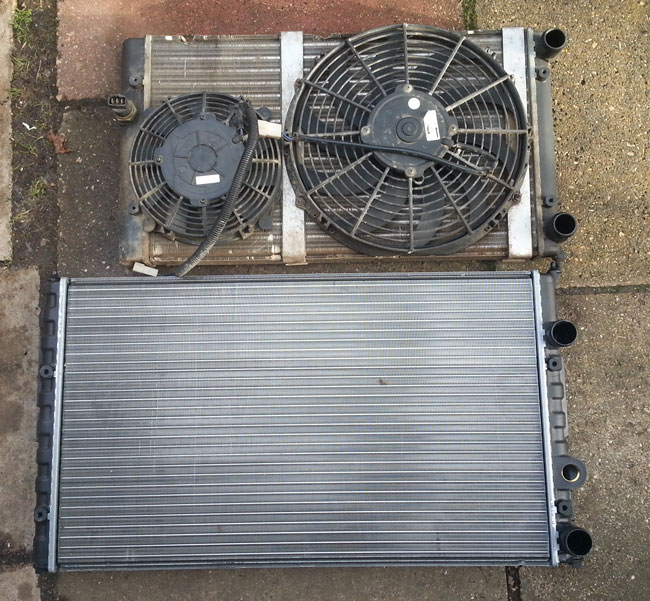
Big rad, little rad!
Well, that’s one mystery solved…
by Darren on Jan.14, 2013, under Seat
… as said the other day, the Ibiza has always overheated – well, not overheated, but run very hot and when used on gravel, definitely overheated – on the Sunseeker the temperature gauge was always far too high for my liking.
And I’ve just found out why! I said I thought the radiator looked a bit small. It is. From the part number, it’s intended for a 1.8 Golf MkIII. With a (maximum) 66kW engine, which equates to 90bhp, give or take. And given that the Ibiza is generating about twice that, I think this may be why it was running hot! Unfortunately, it looks as if the solution will be a bespoke radiator as the space available is somewhat limited by the presence of the (also necessary) oil cooler.

