Cracking time part 2
by Darren on Feb.02, 2012, under Seat
Having the joy of a day off…. I decided to spend it working on the Seat! I have a small list of things that are needed before the Sunseeker, and although none of them are drastic, they’re all the sort of thing that can make the difference between a smooth fun day out and spending the day with bits all over the place and each service patching the car back together.
With that in mind, I thought i’d tackle the most difficult bit first, the fuel tank. While the fuel gauge seemed to work, I wanted to check it out fully, and while I was at it I wanted to check what condition the tank was in – it’s in an aluminium box in the back of the car (as per regs), and I had no idea what it was like inside there. It was a bit of a mystery how to get into it, as it’s quite well sealed up, with an aluminium tube between the filler and the box as well, and it took a fair bit of working out before it was all apart, but it was a pleasant surprise to find this:
One ATL tank – I had expected something with a composite outer and a bag inside, so I was pleased to see something less exotic which is less likely to give any trouble. Splendid. Next up was the sender – the silver disc at the bottom left of the blue access panel above – which I removed to check what the fuel gauge would read when the tank was empty. And it turned out it was worth all this effort – it actually shows about 1/8 on the gauge, which wasn’t what I was expecting. It would have been easy enough to run the car dry on the day, so now I know. I also know that when full it will show full, and that all the gubbins inside the case is in good nick. Putting it all back together was simple enough, thankfully.
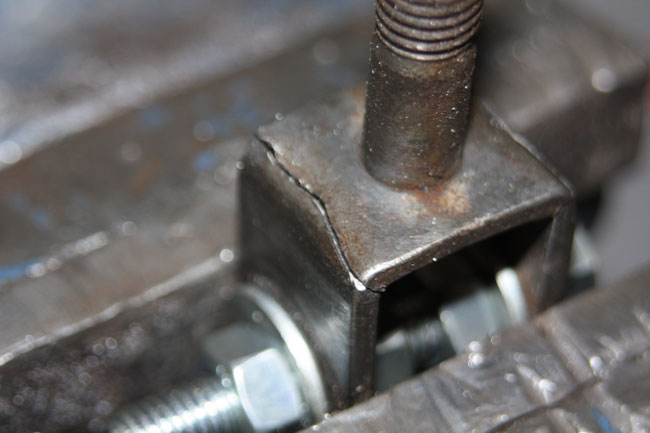
While having a nose around underneath and replacing the sumpguard bolts, I noticed that one of the anti-roll bar ends was cracked; this was fine when the car was MOTed, but it was now in need of a fix. Once removed and cleaned up, it looked like this:
Easily fixed, but still would have been a problem if missed. 10 minutes’ welding saw it all fixed and once cooled back in the car.
Next up, the bias adjuster mounting plate. The original dash panels were a bit rubbish and bodged, so I made a new one piece one up out of aluminium and then painted it. The mountings in the dash still need to be sorted out, but it’ll be a lot better than what was there, and plus the brakes will actually be adjustable which is part of the point of having a bias box in the first place.
I’ve put an entry in for the Sunseeker, which is only a few weeks away, and the list is getting shorter, thankfully.


