Build
Getting closer
by Darren on Oct.17, 2010, under Build
Well, one thing is definitely getting closer – Rally GB 2010. It’s only four weeks today that the last stages will be running. So really it’s three weeks to go. Usually at this point, things are getting desperate, so I’ve had a nice week thinking that although there are still things to do, a lot has been done and the car is mostly there – running well, etc.
I have a list of jobs to do, and it’s split into three sections – mechanical/electrical things (i.e. bits that make the car go), mandatory (things which are related to safety and regulations changes), and cosmetic (which are nice, but let’s face it, I could live without). This list gets printed out at the beginning of any time I spend in the garage, and then I’ll do something from it. This weekend’s main thing was improving the engine mapping, so on Saturday morning I got out in the drive fairly early (although it was a bit cold) and fired the car up. It ran, but not well – it seemed really lean, and the O2 meter confirmed that it was running very lean. I expected it to clear once it warmed up, and the quickest way to do this is to drive the car. On the way down the road I thought it might be getting low on fuel, so I limped to the petrol station, but it made no odds. I had a very slow, sick car that was a challenge just to keep it going and get it home – not helped by a couple of idiots cutting me up and blocking me in on the dual carriageway outside my place.
Anyway, got back and had a look – everything on the ECU seemed fine – right speed, right map settings, until I saw that there was no compensation programmed in for air temperature changes. Which is necessary as cold air is more dense, so more fuel is needed. A bit of searching came up with the right figures for this, and I set them up, as well as isolating the temperature sensor from the plate it is mounted on. Should have been an improvement, but made no odds at all, leading me to the conclusion that there was something in the “real world” that was stopping it running.
Last week I fitted the quick-disconnect fuel sampling valve, and it came in very handy for the next test – checking the fuel pressure, which was very easily done by attaching a gauge to the hose that came with the sampling valve, and plugging it in. I was surprised to see that the fuel pressure was 2 Bar (about 30psi), well short of the 3 Bar it should be. A quick tweak saw rock-solid fuel pressure and a car now running properly. I may get a replacement regulator soon, but in the meantime that will do. Then went for a drive and made some improvements to the map – adjusting the rich running on full throttle, which made the car run cleaner, and it will now take full throttle from 1500rpm in top gear (although pulls slowly due to the cam), which is a good thing in case of inept driving (!)
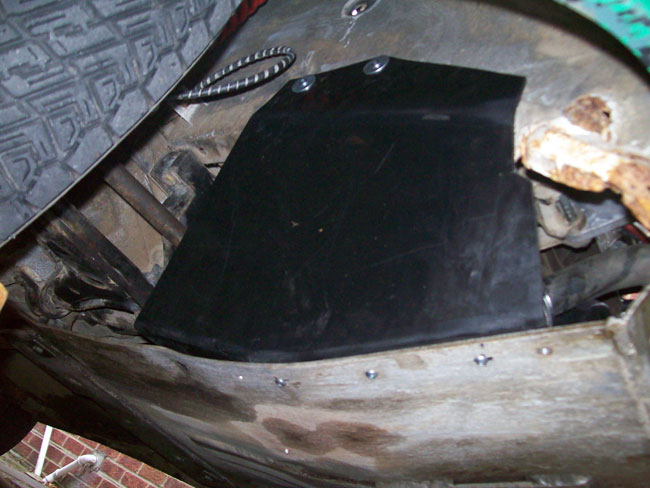
Next up, a small crack had appeared in the exhaust, so that was welded up, and then the next improvement to the car – anyone who saw the pictures of the engine bay after a forest rally will know how messy it can get, and side guards which will stop most of the mud getting in (flung by the front wheels) will improve matters greatly, as well as stop rocks hitting anything important, such as the engine!
This is the right-side one, but the left is pretty much the same. These have been made up from 5mm polypropylene sheet, which is easy enough to cut and bend (using a blowtorch to soften it), but hard enough to resist damage. It also takes rivnuts well, so it made for a nice job, but took a few hours to get right – Saturday was over.
Sunday’s tasks had to be done after fixing my Mum’s car (changing the glow plugs, which is only a small job but took an age as it was so awkward to do), and they were to do some more mapping, and also to chase an oil leak – while it’s not a bad one, there was some leaking from what looked like the sump gasket, so careful cleaning and then running the car was needed to check this, and lo and behold, it was indeed leaking. That’s now been changed for another new one, so hopefully this time it will be oil tight. What isn’t is the gearbox – the gearshift shaft oil seal is leaking, and I can see why – the shaft is quite pitted. I’m not sure whether it’s possible to change it in situ, nor am I sure whether it would make much difference, but obviously what I don’t want to do is ruin it trying to change it and then be unable to do so. One of the driveshaft oil seals is also leaking, so that needs to be done, but that’s straightforward.
Other than that, the list of things to do is now looking pretty small, other than get some new tyres (which have gone up a lot), get a service van hired, and find some money. Oh, and get my licence upgraded – getting a medical done has been a right pain to get done, so I’m hoping that will be done on Wednesday. I have the week after next off, so that’s a big bonus, and although it certainly won’t be like the hell of 2007, there are still lots of things to do.
Like remember (or learn!) how to drive.
Oh, and finally, the cheque has been cashed for Rally GB entry, so I will take it that our entry has been accepted!
More progress.
by Darren on Oct.10, 2010, under Build
This weekend has seen some more progress on getting the car into a rally-ready state. The principal problem I was left with after last weekend was starting the car – it was really difficult to get it to start, and the ECU kept resetting because of low voltage when running the starter motor, meaning it was at best a hit-and-miss affair to get it started, and sometimes the car just wouldn’t start. This, of course, would never do, for obvious reasons – I don’t want to spent £4000 on entering Rally GB to be thwarted with a car that doesn’t start on Friday morning. You might laugh, but this has happened to works teams in the WRC before.
Initially I thought the problem was the battery having seen better days – although it’s not seen a lot of work, it has been left for long periods, but a battery test soon corrected that illusion – it was almost exactly to the spec, which given that it’s nearly 3 years old isn’t bad at all. However, that meant things would be more complex than I’d hoped.
To cut a long story short, it was simple – the earth lead between the engine and the car body was loose, and re-fixing it and cleaning the battery terminals up led to a car which fired up on the button as it should do. This was a good thing, so I celebrated by running around like a madman for a few minutes – I’d been dreading spending the weekend faultfinding earthing problems, not something I’m keen on at the best of times. I’d also discovered an excellent tool in the shape of a wire brush for cleaning battery terminals and leads, a bargain at £1.65.
The wiring loom for the engine needed the plug that goes into the ECU re-waterproofed; I’d removed this when trying to find the cause of the poor starting ages ago, and replacing it was a tricky job involving cutting some 40mm-diameter self-adhesive heatshrink to suit, and then carefully shrinking and glueing it in place. Looks good and waterproof now though.
Wiring gremlins then took over; the mapping that I’ve been doing relies on Innovate Motorsports’ LMA-3 box which plugs into the logging meter that I have, and provides information about the engine speed and throttle position (it also records G-forces as well, but these are just for fun). And there was no throttle readout; it turned out that a stray wire had shorted the supply and blown the fuse, although it was still working as it’s powered from the meter as well. Another hour expired by the time this was located and fixed properly. Then the RPM readout wouldn’t work, and it took a couple of hours to track this down to the lead between the LMA-3 and the meter being slightly dodgy – once all the terminals were spotless it worked properly, but that put paid to Saturday.
Next up, the oil leak. The back of the engine was covered in oil, as was one side of the gearbox. To find the leak, firstly it all needed to be cleaned off, which to do properly takes a while, but once that was done I went for a run up the road and… the back of the engine was covered in oil again. Close examination showed the engine block to be different to the other one, meaning that a different dipstick was needed. Doing that stopped it completely; there is now just a question mark over whether or not the gearchange shaft seal a) leaks and b) can be replaced in situ. I have a new one, but obviously if I knacker the old one up and am unable to get it out then I’ll have made things much worse, so I’ll have to keep an eye on it this week.
It was now getting late on Sunday, and time to drive the car again. It now starts up really easily, just needing some blipping of the throttle until it warms up, and it drives pretty well, although there are still a fair few flat spots in the map to work out. On the upside, the misfire at 5500rpm has finally been eradicated with the new mounting for the crank sensor, so that’s a huge relief. Another relief is that the engine is quite happy pulling to 7000rpm (the redline), and makes good power from about 3000rpm upwards. The map is still off – it’s pretty rich in places, so I’ve logged what’s needed and will be doing so over the coming week to improve it as I go, so hopefully by the end of the week it will be ready for a final mapping session on a proper rolling road to get it set 100%.
Other than that, just some cosmetic work is needed – various things inside the car, and painting the roll cage door bars to clean up all the chips it has acquired, and then the bumpers need a coat of paint. It looks as if we have sorted our accomodation for the week at a reasonable price (i.e. something that I can actually afford) although it does mean a bit of a drive each day to get to the service area, the other option is it cost an extra £200 and be nearer, but I just can’t afford it, to be blunt!
Hopefully next weekend should see the car pretty much ready to go, although I have a week off in a few weeks, so that will obviously provide some breathing room if something (inevitably) doesn’t go to plan!
Blimey.
by Darren on Oct.03, 2010, under Build
There haven’t been any updates on here for a few days, but that’s not to say I’ve not been busy – quite the opposite, in fact.
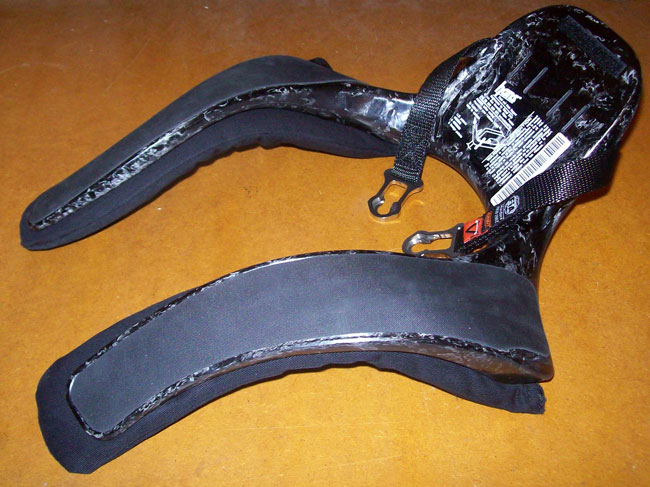
Firstly, I’ve sold a spare car that I had – I had a complete, brand new shell with roll cage that I bought a long time ago with a load of other bits – I had planned to build that at some point, or to use it as a spare shell should the worst happen to R477 KRU. However, storage space for it was going to become difficult in the future, and I needed the money, so I sold it to a chap called Rob who is re-shelling his ex-challenge Felicia, so I know it’ll live on. And what have I done with the proceeds? I’ve bought a HANS device. This may seem extravagant, but hire costs for Rally GB would be about the same as I will lose on buying it, and it gives me the option of using it on other events, including Monte Carlo, should my pipe dream become reality! And more importantly it gives me a chance to see whether or not wearing it in the car is going to work out – I’ve heard several people say that their seat/harness/position made it really uncomfortable, and that isn’t something that I can afford to find out on the Thursday of Rally GB. I’ve sat in the car with belts on, and it seems OK, I think it’s something you’ll just get used to after a bit.
It’s very light (made from formed carbon fibre, hence the funky appearance under a flash), and sounds like it’s ceramic when something knocks on it. I guess it will be somewhat awkward to get off and into the back of the car at the end of stages, but there you go….
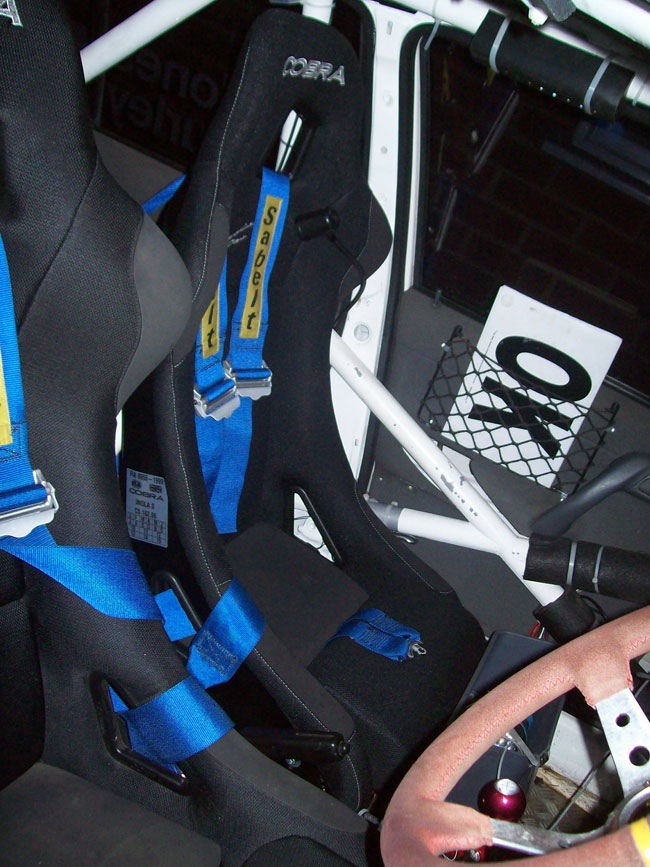
Next up: Seating. The FIA’s rules of seat lifing mean that Paul’s seat is out of date (being 5 years old), and the manufacturer won’t re-certify it. So I have a perfectly good seat which needs to be replaced. After a lot of wailing, gnashing of teeth and shopping about, I found a replacement at Larkspeed for £360 delivered. Which isn’t cheap, but is better than the £450 that others were selling them for. To help recoup some of that cost, the old seat is being sold on eBay, and should get me about half the cost back as they are still useful for other motorsport disciplines and for the fast road crowd. The big upside of getting a straight replacement is that bolting it in was straightforward – undo bolts, remove seat, put new seat in, replace bolts. If only everything was that simple! Another advantage of the new seat is that is has a recess to suit the HANS device (my seat already had this), so that’s an upside….
And yes, only my bank account knows the difference!
You want more? Splendid. I’ve got it.
Easy stuff: Air filter. The last one was a bit crap, so I went mad and have replaced it with a K&N filter of nominally the same size. According to K&N’s calculator it’s actually a bit too big, but that’s no bad thing. And being able to fit something in 3 minutes is a good thing too.
Less easy stuff: The crank trigger mounting has been strengthened further, which seems simple but actually took 4 hours to do, with lots of messing about to make it suit a new (and replaceable) crank trigger instead of the old one. This means I can finally get and carry a spare for this most annoying of devices. However, I’ve not actually had the car running with the new one because of the next problem: The ECU keeps resetting itself when cranking, and I think the battery is to blame; it doesn’t go flat flat, but when cranking the voltage drops enough to reset the ECU, and the end result is a car that doesn’t run. This can hopefully be sorted fairly easily, but it means I currently have a car that doesn’t go.
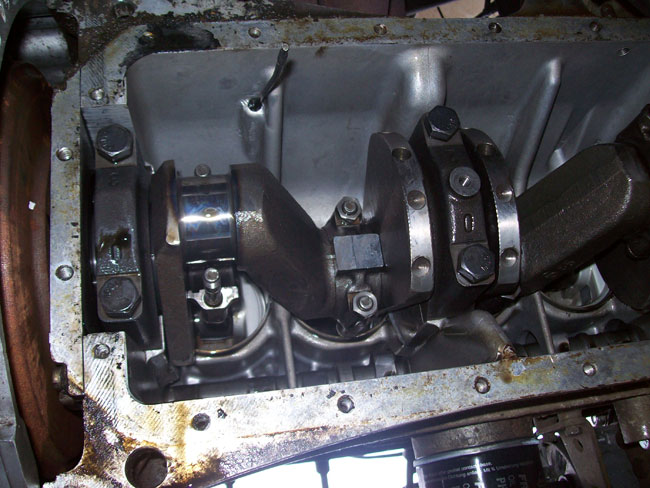
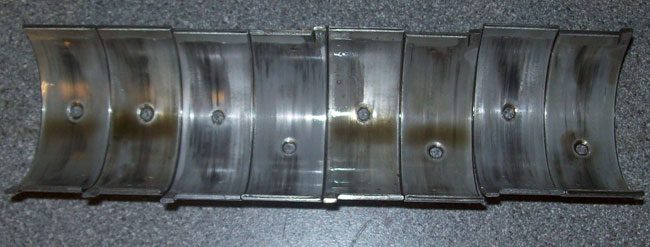
Far more involved: The engine I’m running at the moment has a bottom end that did Rally GB in 07, and those with long memories (or an obsession) will remember that the oil pressure wasn’t all it could be – there were a couple of times when we’d finish a stage and the pressure would be non-existant at tickover. This probably wasn’t helped by the fact that at one point in its life it had been run without any oil! Worn bearings are a fact of life on the Skoda engine, so it was time to try to address this, something that I did before GB 08 with another engine which behaved similarly. It’s fairly easy to do – drain the oil, unbolt the sump and oil pickup, and there you have the guts of the engine – here’s a pic of what it looks like:
If you’re not sure, this is from under the engine, looking up. The white area at the bottom is the sky, and the wiry thing at the top is the dipstick. No.4 big end is removed. Removing the big ends was first, and when they were out, it was easy to see that they had seen better days!
They should be smooth without any wear, not shiny and stripey like these ones are. The bearings that the crank runs on (main bearings) were much the same, although replacing them is a little more involved as getting the top ones out needs a bit more careful persuasion. All good though, and then a case of bolting it all back together, using a new gasket and sealer as the old one was leaking. This took a couple of hours, as I’d rather do it right than quickly, and also I wanted to avoid doing myself in.
More easy stuff: The door bars look shabby (yes, I know, I’m talking about cosmetic things!), so I’ve touched in the chips in the paint from the harnesses hitting them, and they will be then covered in ‘helicopter tape’ which apparently is near-indestructible, so that could be very useful. Plus the door bar rollcage foam was quite shabby (as I kick it every time I get in), so that’s been replaced too. The car’s 5v supply (for the GPS unit, and to charge Paul’s phone which he uses with Memory Map) was playing up, and that was traced to a faulty connection which has been replaced. Plus (more cosmetics), I’ve finally removed the grey and white overspray from the driver’s door shut, which looked terrible. Again, not terribly important but given that I couldn’t get a new battery this afternoon (without paying Halfrauds which I simply refuse to do), I was limited.
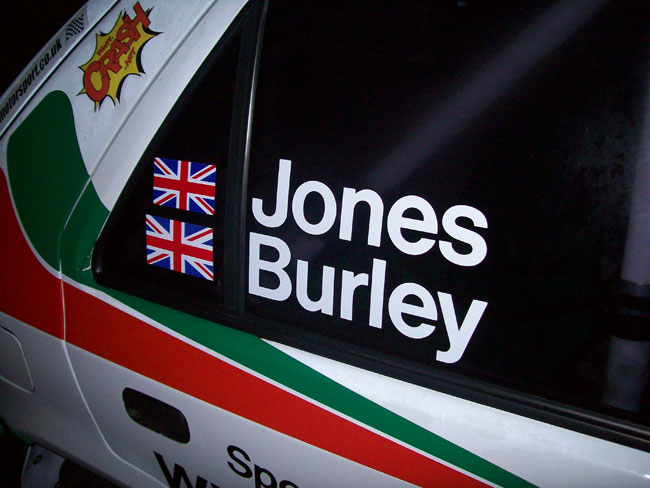
Regulations: There are a few things that are needed on the car, and I’ve done some of them to keep with the regulations: First is to replace the names on the rear door window – in previous years this has only been my name, but now the FIA has finally realised that people are capable of reading two names and understanding that there are two people in the car! So both Jones and Burley are there now, with the appropriate flags.
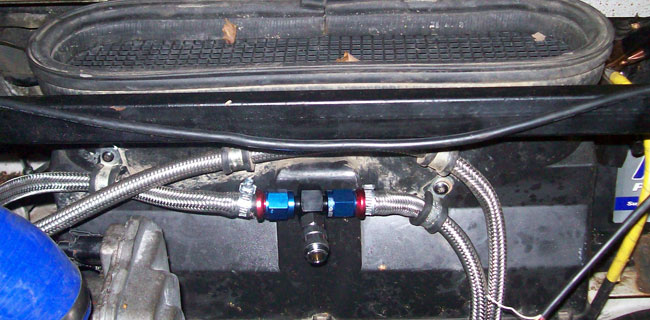
There’s something less trivial though, in that a fuel sampling point is needed; all cars competing in the event need to have provision for the fuel to the taken for testing. While this isn’t something that I would think is a practical issue for us (after all, the line “Go to the Murco, mate” would get the fuel we’re using sorted), it is something we have to comply with, so I’ve bought a fuel sampling coupling and pipe, so that fuel can be taken for testing if needs be.
Note to the eagle eyed – this is only temporary, in terms of the pipe fittings, they will be finished better during the week!
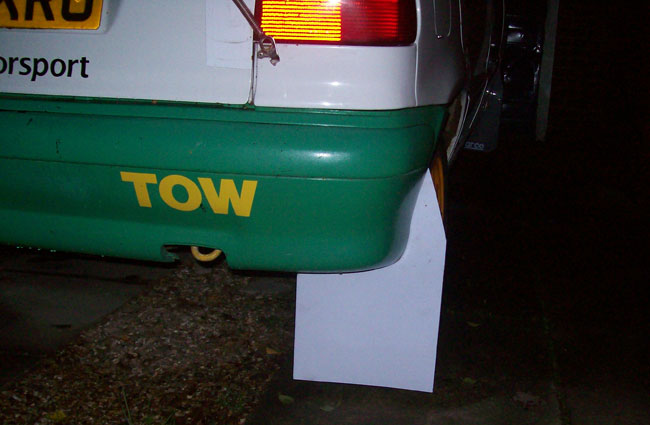
Oh, and mudflaps. The old ones were perfectly good. Until I ran one of the rear ones over, when reversing into the drive after Rally Day (if you go up a kerb backwards, it gets ripped off!). And the MSA have decided that mudflaps now have to be 4mm thick, so I’ve blown even more money on new mudflaps, which are very white and pretty, and 4mm thick. The rears are fitted, but it was raining nearly all day today, so getting soaked doing that wasn’t really a good idea, so I’ll leave the others for whenever the weather is better.
So, that’s it. At present the car is pretty much there – there’s an oil leak to trace (which I’m hoping the sump gasket already has done), the starting issue (a new battery), final mapping, and some cosmetic issues to address, plus some improvements to the sumpguard to protect the engine bay from mud getting in – basically some polypropylene sheet to fit to it. And hopefully that can all be done next weekend.
Oh, and I was mentioned in Motorsports News, after speaking to Sean at RallyDay and on the phone last week!
Entries for Rally GB close on the 20th, which is two weeks on Wednesday. I guess it’s time to enter?
Rallyday 2010
by Darren on Sep.18, 2010, under Build
Today was Rallyday, a rally-themed car show, which is annually held at Castle Combe circuit, near Bath. Last year’s trip did not go well, leading to a blown head gasket, a dodgy drive home and a generally displeased owner. So, when I set out at 6:30am this morning to get there, I was somewhat nervous; the car going wrong anywhere would be bad, but particularly on an important day, with a chance to get the car seen by lots of people, plus to meet up with a few rallying friends without the pressure of competing which often makes having a laugh difficult.
The car started up OK, and I got going to find that the heater motor wouldn’t switch on, so opened the windows and froze for a while – the engine warmed up pretty quickly and became fairly drivable then as well. The mapping changes I’d made on Friday left the engine running crisply in the typical cruising speeds (about 4000 rpm in top equates to 60mph or so), and everything felt good – no unusual noises, dodgy readings or anything. It even ticked over when I got to the inevitable queue at the track access road!
Got parked up and said hello to everyone from BDCC, and then went to get signed up for the track session – the briefing was much the same as ever (although from a guy who was nicer than usual), and then I was ready for noise test. I ended up in the queue behind Matt Pyle’s legacy (which I navigated in on RBMR last year), and it was incredibly noisy – I didn’t think it would pass, although as Matt didn’t have his form filled out they wouldn’t noise test him. I didn’t either, but they let me fill mine in (thanks guys) with their pen, and I passed (96dB). Matt’s later test would be 110dB. Which is 10dB over the limit, so he ended up having an extension silencer added, as did many cars.
It was time for the first session, and the weather was beautiful. Got the car started and to the track, and I was first in the queue. And went to pull onto the track, and…. nothing. The rev limit light flashed quite a few times, which is usually a sign of the crank sensor problem and the ECU resetting. Misery – the car would barely pull 20mph, and I limped round the track and exited having not even made a full lap. Back to the place to park up and got the laptop on it, and saw over 1000 sync errors (each one will make the car backfire or stop running), and had a look – the sensor seemed to be too far away, so I adjusted it and third time lucky, it fired and ran sweetly – and now, no more errors. Hopefully the second session would go better, so I went to queue and met up with Peter Trott from Top Oils, who are sponsoring us on Rally GB this year, and had a good chat about everything. And then Sean Moriarty appeared, from Motorsports News, so we spent a bit of time chatting about this year, and the changes that have been made and plans to do Rally GB, etc. And the more I talked about it, the better I felt about it! Up until that point, it had seemed just like something I was saying, but now it seemed to be real. Sean was really friendly as ever, and enthusiastic about what we’re doing, so hopefully he’ll run something in MN and we’ll bag some publicity for Top Oils as a result.
It was time to go out on track, and this time…. it went well! Got out there and was taking it easy, but with the gravel tyres on the car it was sliding all over the place anyway, so it was good fun, even if it was slow. Each lap I gave the car more revs and more throttle, and it seemed OK, although it was running pretty rich, so I didn’t give it too much. Obviously all the other cars were going much more quickly, so I spent a lot of time moving left to let them pass, but it was good, and time to come in too quickly.
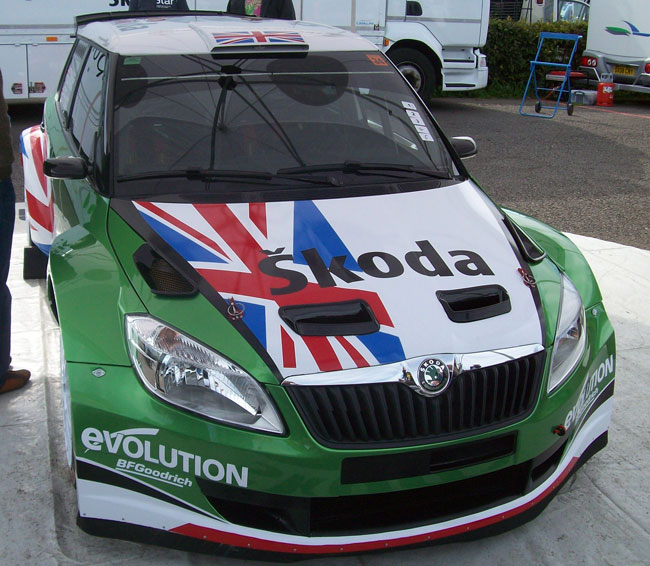
There was then a long time to the next time out on track (about 5 hours), so after speaking to Peter for a bit and getting a couple of Bardahl T-Shirts for Paul and me to wear, I went for a wander, and saw the usual cars there, as well as the S2000 Fabia:
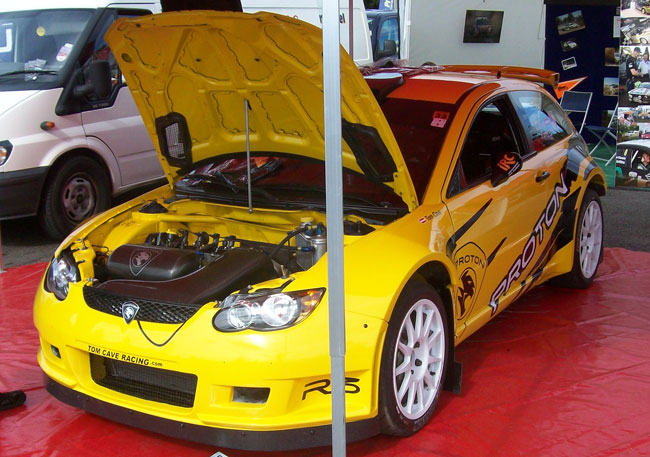
Which looks amazing, it really does. And later I’d see that it goes pretty well too. There was also the S2000 Proton:
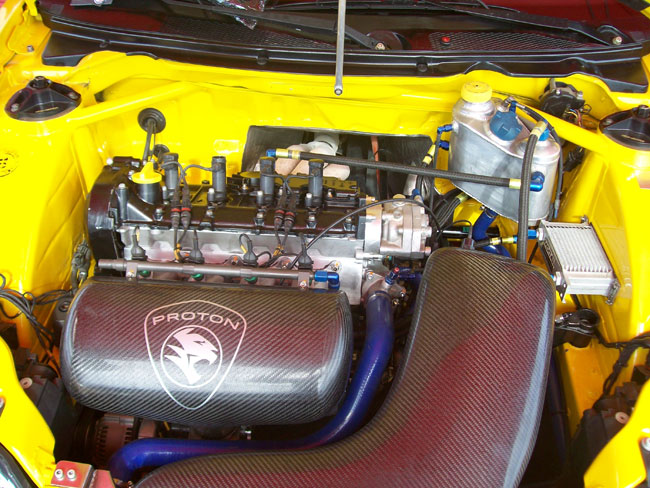
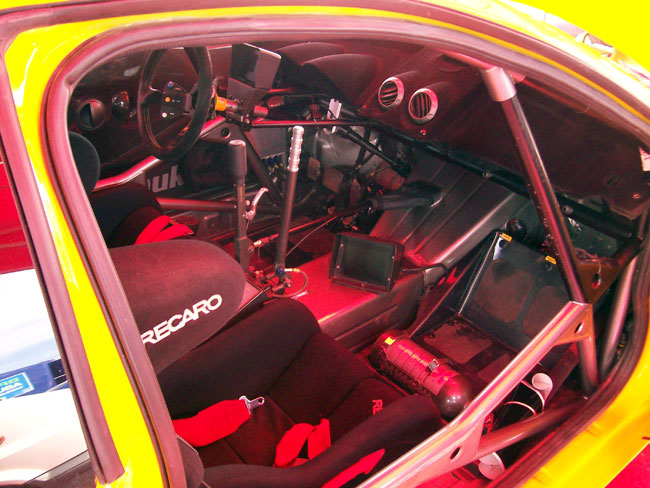
Which you could get into all the nooks and crannies, and see what an amazingly built car it is – even the bonnet stay was a work of art (and very clever too). Nice to see a car like that on display that you could get really close to. The interior was a masterpiece of minimalism, there’s next-to-nothing inside it, and just a touch panel for all the car’s controls, and a large LCD for the navigator. Really impressive, even this part of it.
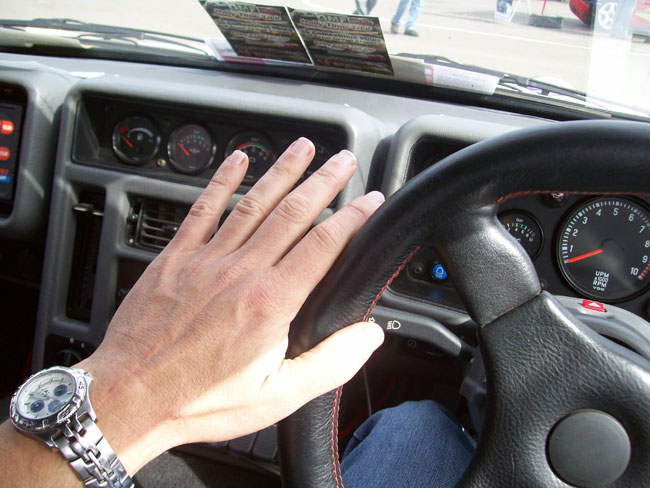
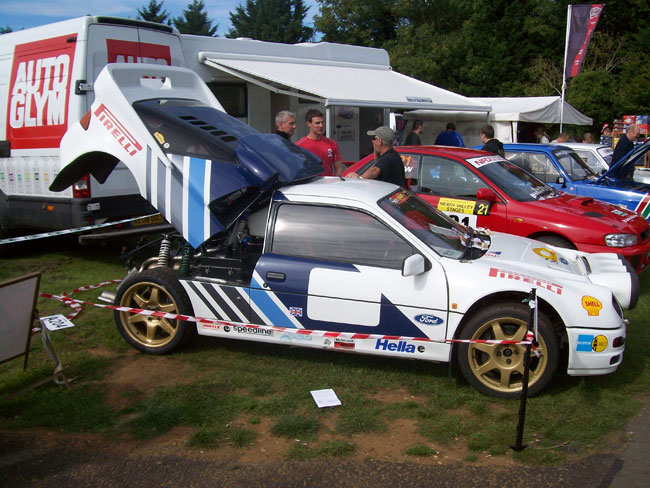
Wandered about some more, and saw an RS200, which is my favourite car ever. The back was open showing the engine, and spent some time talking to the owner, a really nice guy who wanted to use the car as intended rather than it be a show piece with every part polished. I asked if I could look inside, and he opened it up and said I could get in! Brilliant, I’d get to sit in my dream car. For some reason I didn’t ask anyone to take a pic of me, but I did take a pic of my hand inside it:
Brilliant!
So, a dream achieved, I wandered back to the car, and then Tammie arrived with the kids, so we wandered around some more and had lunch, and so on. The feature stage was on at this point, and got to see various cars on there hooning around, and I still wonder why they don’t put the chicanes there for the “normal” people to go round – it’d be much more rally-like than the open track. Oh well.
Soon enough, it was time for Tammie to get signed up as a passenger and then me take her round. We got onto the track and headed for Quarry, which is a fairly fast entry for a corner, and I heard a squeal from her and could see her pressing hard on the navigator’s footrest, probably for an imaginary brake pedal. Each lap I did I went a bit quicker, and took the corners a bit closer to the bollards, and afterwards was told that I’d scared her to death! Still, she was smiling, your honour…. It’s just a pity that there weren’t any more takers for rides in the car, but there you go. That, really was it – I was happy the car was still all in one large and running piece, and that as much coverage as possible had been had for us and for Top Oils, so it was time to drive home, which was thankfully uneventful aside from the left front coming loose about half way home, so i’ll need to look at what’s happened there as they were torqued up! Thanks to James from BDCC for stopping to check if I was OK as he drove past. Here are some more pictures from the day:
The inlet ducting and plenum on this car probably cost more than my car did to build, and indeed more than it will cost us to do Rally GB 2010.
Progress and new wheels!
by Darren on Sep.16, 2010, under Build
So, today has seen a bit of progress on the car – I finished work an hour early, so I got the crank trigger issue sorted – turns out the trigger wheel is slightly off-centre, so that and the vibration was the problem combined. I have set the gap to sort the problem for the moment (using feeler gauges) but next week I’ll take it off and have it machined to be totally true. However, it’s running OK, and I’ve even had a chance to clean the poor old thing up – where it sits outside the roof has gained some interesting black spots which take quite an effort to get off, so i’ve done about half the roof. I’ve also fitted a mounting to the front of the roof for the new camera I have, the GoPro Motorsports wide, which will allow a few different camera angles to be quickly and easily set, plus running a camera inside and one outside as well – I’m hoping to experiment with that on Saturday.
New wheels have arrived – another set of 4 Felicia Fun wheels, so I have more lovely yellow Skoda alloys to bend on Rally GB this year. They were only £20 each, a bargain – way cheaper than the tyres that will go on them!
A long weekend…
by Darren on Sep.12, 2010, under Build
.. for most people means taking an extra day off. This time of year for me it means working on the car a lot!
The plan was fairly simple – the car ran OK the other day, so spend the day driving it, slowly improving the way the engine runs. This, in principle, is fairly simple. Last year I invested in a couple of piece of kit that allow me to map the way the engine runs – they measure the engine’s speed and how far open the throttle is, and measure the air/fuel mixture at that point, and record all of this information. After driving the car for a bit (to average out little errors and to drive in as many different speed/throttle positions as possible) this log can be downloaded and then analysed using the LogWorks software which can also take the engine’s current settings and calculate new ones. That’s how it should work, and within a few sessions you get a fairly driveable engine. Then the car can be taken to a rolling road to fine-tune all of these settings and also to set the ignition timing (which is critical for maximum performance).
However, things aren’t quite that simple. The first issue is the software that comes with the ECU that I’m using. In short, it’s awful. When I got the car mapped before Rally GB 2008, the dyno operator hated it, and I can’t argue with that at all. Anyone who knows me knows I’m a bit of a techie/software geek, and I’m quite happy using things on computers that would freak most people out, so it’s not just a case of it being complex or even a bit geeky. It’s just awful. The kind of software that constantly leaves you saying “who did this?”, every time you change something. Now, this wibbling might seem irrelevant, but it’s not; it actually creates a real problem when setting the car up. The reason? You can’t copy or paste from/to the fuelling map. No really, copy and paste, something which has been in the Windows World since, oooh, 1988. No, you can’t do that. Which makes for a far more complex setup. I will spare you the full horror, but let’s just say it’s good that I’m game to use any means to get something done, in this case working out the file format that the software stores the engine settings in, and then converting that to a spreadsheet, and then putting the newly-generated values into that. Then it’s the reverse – taking those settings and converting them back into the format the ECU will understand. It’s about a 5-stage process, but at least I’ve done it enough times now to have it fairly well down. And the big bonus? You can go for a drive for 30 minutes and change maybe 75% of the fuelling map.
OK, so that’s the real plan. And if it had gone that simply, then I would have been writing this 24 hours ago….
Saturday started out simply enough – got the car running, and went for a first little drive; Tammie was in the passenger seat, and it all seemed OK. However, the car wasn’t keen to re-start, and as it was running so lean I thought it best to add some more fuel before driving back. Two things happened – one was an amazed passenger that you can transform the way the car behaves without having to “do something under the bonnet” and two, the car drove better. But the laptop’s battery was dead and I don’t like going out without it as it can diagnose an electronic issue instantly, so it was time for lunch, and for me to get on with it alone in the afternoon.
The problem came that the car just didn’t want to start up in the afternoon. No amount of coaxing would get it to fire. And it soon looked like the problem was the battery – when cranking, the ECU would disconnect from the laptop, I assumed from low voltage. So time for a charge, and a few more hours wasted, but I took the opportunity to go buy some more spark plugs.
Even after that, when the car did run, it ran like crap. Lumpy, unhappy, and really just plain odd. Usually when a car is missing on one cylinder it’s fairly easy to diagnose which one, but removing an injector connector on each cylinder just made an incremental kind of worse, rather than changing anything massively (or as it should do, not making any difference if that was the bad cylinder). Really weird and frustrating; sometimes it would seem to clear for a few seconds, and then run rough again. A change of plugs didn’t do much for it. I’d checked things over and over again, and didn’t seem to be getting anywhere. And when I tried the ECU’s “test” mode (where it fires the injectors and spark plugs), nothing happened. I knew it would fire normally (otherwise it wouldn’t run), but there was clearly something odd. In addition the laptop kept having communication errors with the ECU and with the logging hardware (both use serial ports, and I use an old laptop solely for this purpose). It was getting dark and I’d had enough, so I gave up. At this point, any chance of going to RallyDay seemed to have vanished.
A good night’s sleep often does wonders. Admittedly I did wake up with that “oh no…” feeling, but thought about checking all the little things that could be a problem, starting from scratch. And found a few things – firstly, the reason for the ECU’s test mode not working – I’d followed Skoda’s practice of powering the injectors and coil from the fuel pump output, which isn’t triggered in test mode (for obvious reasons, you’d flood the engine and set fire to it at the same time!), so I rewired to power them from the ECU power, which enabled test mode (which plays a lovely out-of-tune tune) and showed that coils and injectors were all working (I primed the fuel pressure first and then collected fuel into a jar, one injector at a time). So, two hours down, and no actual progress. To eradicate the laptop problem, I had to go and buy a USB-Serial adapter (so I could use my ‘proper’ laptop), which meant I could download a log, but it still doesn’t work with the ECU software as it refuses to see the port in question. GRRR! Then something struck me. I’d adjusted the valve clearances when building the engine, but not since it had been hot and then cooled, and some settling in may have occurred. And it had – although there was clearance on each valve, on some it was much less than the spec 0.25mm, so I re-did them all. I also realised I’d not reset the ECU to the throttle body (having noticed when it was running that closed throttle was registered as 20%), and then fired up. It didn’t sound great, but it did run. And well enough for me to strap everything back in place, and try to go for a drive.
It drove OK. Not amazingly, obviously, but above 3000rpm it was clean and clear, and went pretty well. Well enough to do a 20 minute log drive, and to come home and look at the data, and realise I’d not reconnected the RPM trigger to the logger, so that data was all null as the engine was apparently stopped!
Another drive was done after it was connected, and the engine behaved much the same – quite a misfire below 3000, but above seemed clean and clear, despite running quite rich after my hamfisted “richen the map everywhere” adjustment. I was careful not to stress the engine too much, and it seemed happy enough, so I did about 20 minutes and then went through the process of recalculation, and repeated this three times over the course of the day – each time with the car driving better, and being able to take it to more “extreme” areas of the map, either low speed with big throttle or lots of load, etc. The main problem, though, was that when you got to 5500rpm in 4th or 5th gear, then the engine would keep stuttering; it woudl just die and kick back in and so on. Didn’t do it in any other gear (it accelerates quite quickly), which was odd. I had a think about it and then went for a final run with the laptop connected to the ECU; the software of horror has one screen which is really useful, which shows you a running count of things you’d not like to see, including crank trigger problems. And lo and behold, every time the stuttering occurred, the crank trigger was at fault – the counter would jump up by 10 or 20 each time, and never change at any other time in the half hour I ran it like this. It seems to me that the bracket that it’s on is vibrating at that speed (as it works fine above it), and when you’re in a high gear it’s at that speed long enough to let it get going. A strengthened one is on the list of things to do this week.
So, having had a horrific Saturday, Sunday has actually been good and productive. OK, it’s taken me all day (aside from slacking off to watch the F1 and have lunch), but it’s now fairly driveable, and with any luck the stronger bracket will kill the misfire for good (it also does it sometimes at about half that speed, which makes sense and adds credence to the ‘resonance’ theory). As Gene Krantz said, “Work the problem. Don’t make things worse by guessing.” Hopefully this approach will see the car at RallyDay!
And another!
by Darren on Sep.05, 2010, under Build
OK, so after the last debacle, I was left with three options:
- Fit a standard bottom end, but with a different camshaft in it (I have a standard Felicia engine in the shed)
- Fit a previous rally engine (One used on Rally GB 2007), which went really well, but was a bit low on oil pressure when hot – a simple thing to fit at a later date, and an engine which was known to have had a fair bit of work done to it, plus a good cam already fitted; fit the Motor Excel head to this
- Get a new bottom end built (or build one)
Option 3 wasn’t really an option at the moment – simply put, I don’t have the money. So it was between the first and second ones; I elected for the second one as the engine was known to be good (the one thing we didn’t lack on Rally GB 2007 was power, and the fault that put us out was the throttle body), and it was actually a toss of a coin between fitting this engine and the one which has just died. However, before doing so it would need to be checked for piston protrusion, just like the last one. And once it had been grabbed out of the shed, cleaned off and then had the head removed, it measured up pretty well – 0.5mm against the spec 0.8, but I was happy that was close enough, particularly given circumstances. However, it was missing the flywheel. Now I know that on many engines the crank and flywheel are balanced as a pair, but the last Skoda crank I took for balancing needed nothing done to it at all, the flywheel ended up being balanced on its own. And given this, and the fact that I just don’t have time to spend a week waiting for it to be balanced, having taken the engine apart, I took the flywheel from engine #1 (which had been lightened and balanced) and fitted that. Next up, time to fit the head, which involved lots of careful cleaning, fitting of a new gasket, and setting the valve clearances. Doing this meant putting the front pulley on properly (it was just placed on since it had been removed for use on another engine), and when I did this up…. the engine stopped turning. Most puzzling, so I just carried on setting the valve clearances by turning the engine using the flywheel. However, this still meant that I had a problem – the front pulley getting done up stopped the engine turning. I checked inside the front cover and couldn’t see anything, so the only conclusion I could come to is that the thrust bearing (which controls the side-to-side movement of the crank) had moved – on the Felicia engine it’s a large ring which has a tab on it to stop it spinning, and if the crank moves to the back of the engine, this could rotate and get stuck. So the sump had to come off (and gave me a chance to give it a good clean inside), and lo and behold, I was right – the bearing had indeed spun, but was easily put back into place, and then fitting the front pulley held everything in the right place. Sump back on, another hour taken up. Fitted the water pump, checked everything over, and then got the gearbox on, with the help of my Mum – again it was dead easy doing it on the stand. What wasn’t easy, though was refitting the engine – I’d spent a fair while bent over sorting out the bearing problem, and managed to sprain something in my lower back. Not really badly, not like last year, but bad enough to give me real pain. Soldiered on and got the engine and box bolted into place (again, another thing that goes far more smoothly with a sling holding the engine in the correct balance), and then took a break for an hour to hopefully recover a bit (not much, alas). Then the typical work of refitting the inlet manifold, starter, thermostat housing, alternator, driveshafts and hubs, etc. Then… it rained! So that was that for Saturday, and a good thing too as I was pretty much done in!
Sunday afternoon it was time to finish off the things that were needed to see if it would run well, and thankfully I had Tammie (my girlfriend) on hand to help out! She’d been visiting this weekend, but had kindly gone shopping while I was fitting everything, and was happy to give me a hand for an hour to finish everything off, so she did various jobs including filling gearbox oil, engine oil and water, while I did the other things that were needed. And then time to get it running. As ever, firstly built oil pressure with the injectors and coilpack disconnected, and then reconnected them to fire it up. Two things happened – it fired, but ran only on two cylinders, and revved a LOT. Not a good start.
I did a compression test, and found all four cylinders good and consistent, so hopefully not a mechanical issue for the misfire, and put a new set of platinum plugs in. And found the reason for the high revving – the servo hose was off, letting far too much air in. With it refitted, I fired it up, and it sounded good! After a bit of blipping the throttle to warm it up, it seemed happy enough, so I got Tammie to keep it going and felt the breather to see how heavily it was breathing. It wasn’t at all – seemed really sound, so very little blow-by, a real relief.
So, third time lucky? Let’s hope so. The bearings will need changing at some point, but that’s £40 and an hour’s work, easily done as I’ve done it before, both big ends and mains can be replaced in situ. But for the time being, that should do the trick, and won’t make any difference to the engine’s mapping situation, so I can start driving it during the week to get it set up properly for RallyDay 2010, and spend the week getting better myself as well. Rides in the Skoda will be available on eBay!
If it wasn’t for bad luck…
by Darren on Sep.03, 2010, under Build
…I wouldn’t have any at all!
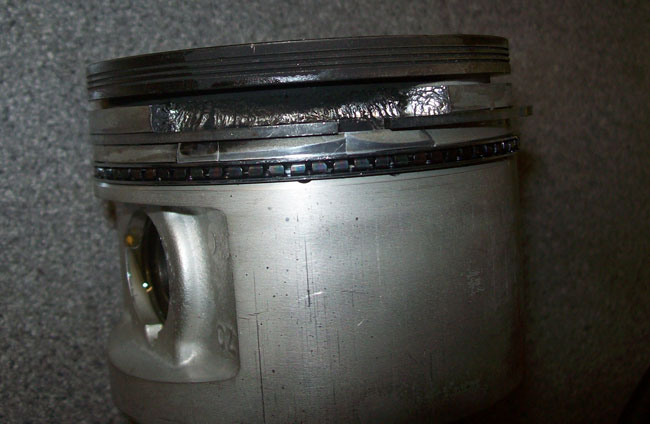
This afternoon I was off work, so I got the sump off the engine (easy enough), and then set about removing the pistons – again, easy enough as it just involves undoing the big end caps, and then popping the pistons out of the top of the engine. I decided to do No.1 first as it was where the problem apparently lay. It came out easily enough, and it didn’t take too much looking at it to see what was wrong…
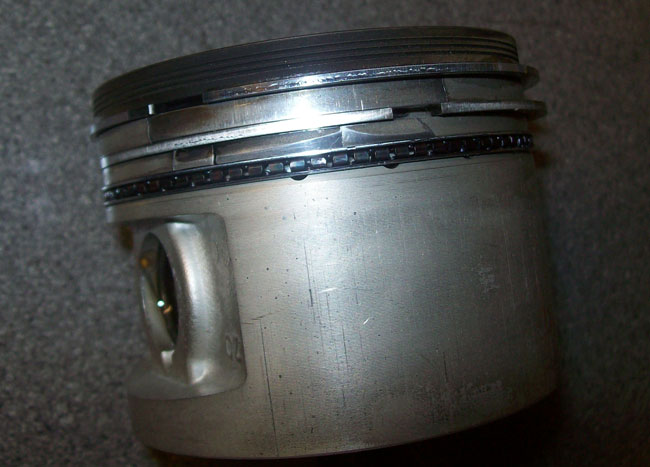
The rings were fine. The piston between them was cracked. No idea how this had happened as I thought I was very careful when I fitted them (they fitted in really easily), plus it originally ran well for a good while before it all went wrong. Very odd. But undoubtedly not good news… Once the top ring was off, a big section of piston came out.
And the same was true for the next ring too (the pic I’ve taken is really blurred, so i’ll do another one soon). So, that looks like that’s it for that – the only spare piston I have is not the right ‘grade’ for the liner in the engine, and frankly given this I wouldn’t trust the rest of the engine, so it’s time for another! Yes, it’s engine change time. I have another good engine (ran very well) which has been in the shed for a while, so I will put that one in instead – the head is already fitted, so hopefully over the course of the weekend it will get fitted and be running. That’s the plan anyway, as the weather is going to turn nasty here on Monday…
Post Mortem!
by Darren on Sep.02, 2010, under Build
OK, so after yesterday I thought it best to leave the engine to cool down completely before removing the head, as I didn’t want any problems. And that was wise, as the dismantling was fairly straightforward, as you’d expect with something that was only assembled 5 days ago. Everything came apart easily enough, and the head has been undamaged by its undignified start in life. Phew!
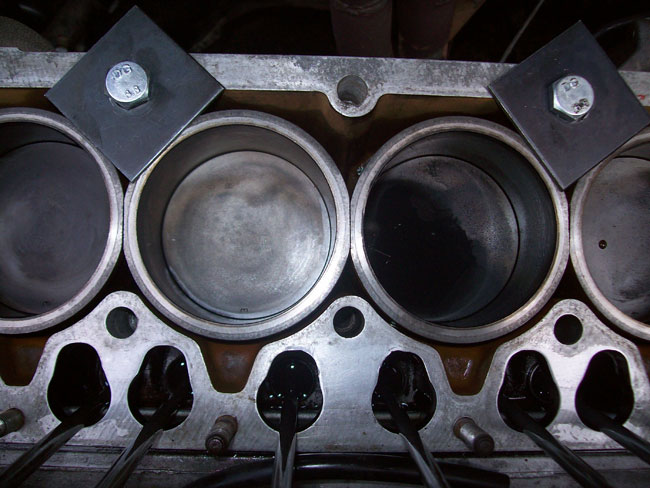
The bottom end seems to be a different story. It would appear that most of the problem comes from the rings – from what I’ve been reading since yesterday, a too-gentle break-in can be a problem, as can too much fuel. Both of which definitely happened when these were first being run – it was taken VERY easily for the first few hundred miles, so that could be a problem, and it was also too rich. There is lots of oil build-up on the tops of the pistons, as seen on the one on the right in this picture – the ones on the left have been cleaned, while no.3 is untouched (and black and sticky!).
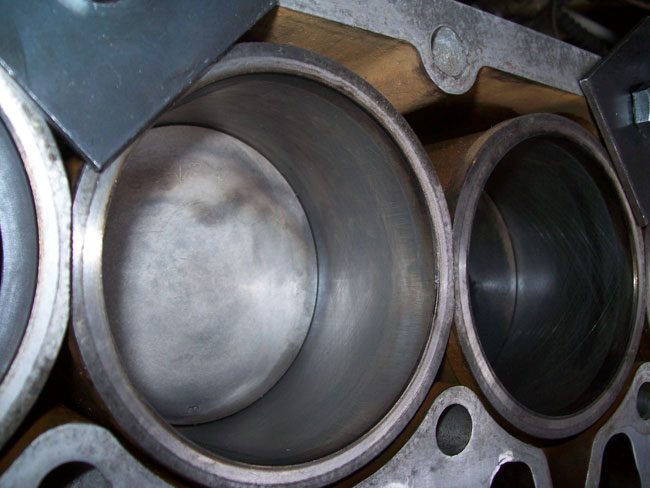
The bores seem to be a bit glazed, from what I can tell, so they need honing:
The plan with these is to remove them (taking the sump off, then pistons out the top), and then hone the bores. They can be removed from the block to do this, which is probably the best idea, as there will be grit, and grit and engines don’t really get on too well. Or at all.
The other problem is whether or not the head gasket was actually blown – there was no evidence at all of it having done so when looking at the gasket, and the liners seem to be the right protrusion above the block – they certainly seem to have been clamped down well by the head/gasket as the gasket looks (to me) to be spot on. However, the gasket was a bit dodgy, it turns out, there were a couple of bits of surface rust on it, which I’d not spotted. I looked at another one in the same packet, and it too has some rust marks on it, so I’m hoping this is the issue, although I will have to re-do the liners anyway if I remove them. All the parts to do all this are arriving tomorrow, so hopefully by the end of the weekend it will all be done and the car will be running properly. End of the weekend? Why? Well, today’s my birthday, and I’m “out out” tomorrow night, so I’m not sure how precise my work will be on Saturday – I’m hoping to get everything out tomorrow afternoon before the carnage begins.
2 weeks to RallyDay!
No-one ever said…
by Darren on Sep.01, 2010, under Build
…it was going to be easy. Today started out well enough, went to the Post Office, taxed the car, got it started easily, got everything set up for mapping/logging, and then went for a short drive. Came back, and noticed that the engine seemed to be breathing quite heavily. Not a good start, but it seemed happy enough, so I carried on, and did a longer drive with the LM-1 logging everything it needs to do the mapping changes. Car went well – not outstanding, but well enough for a first run, and didn’t play up, even ticking over without problems. When I got back it seemed OK aside from being a bit smoky again from the breather.
Took all the data from the LM-1 and put it into the computer to adjust the map settings, and I’d forgotten how to do a lot of it (as you have to convert the ECU’s format into a CSV file, and then import that into Excel, and use this in conjunction with the LM-1 “LogWorks” software to calculate new map values, and then transfer it all back again, and finally upload it to the ECU) – it took an hour to get all this done, but it was then time for the second run. I fired the car up and it didn’t seem to great, seeming to miss on one cylinder, but I thought it would clear.
It didn’t.
Came back and did some checks – low compression on number 1 cylinder, the other 3 were OK. Putting oil down the bores increased the compression by 2 bar, even on the bad cylinder, so my diagnosis is that the rings didn’t bed in properly on this engine, so a new set are needed along with the liners being honed. And, of course, a new head gasket and I would think re-setting the position of liner number 1. Not a total disaster, but certainly not what I’d like to be writing about today. Parts have been ordered, but won’t be coming until at least Saturday morning, so that leaves me plenty of time to get it ready for RallyDay…
