Build
An interesting day…
by Darren on Sep.29, 2011, under Build
Today was the day a number of things were due to arrive – the main things being the now-serviced fire extinguishers, and also the ex-dealer stock un-run engine I’d bought as an insurance policy to get the car running again. Mum had kindly agreed to stay in all day, so I went to get her the papers before I went to work, and I came back to a surprise – not only had my engine parts finally arrived from the Czech republic (pistons, bearings, liners, etc), but also my rear shock is back from Proflex, fully rebuilt! Excellent.
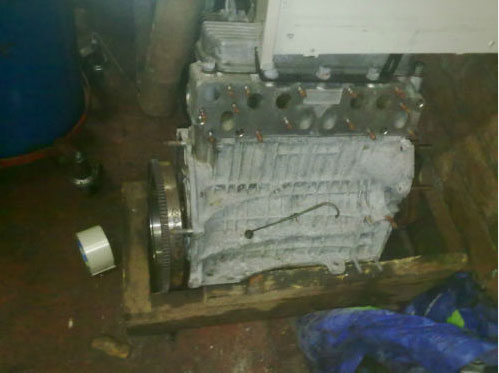
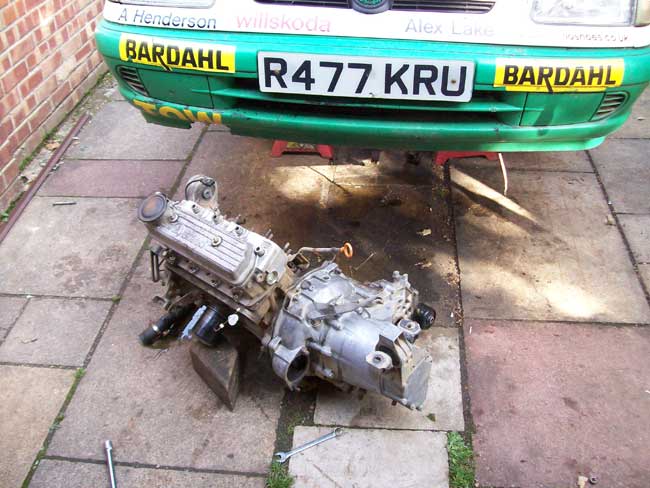
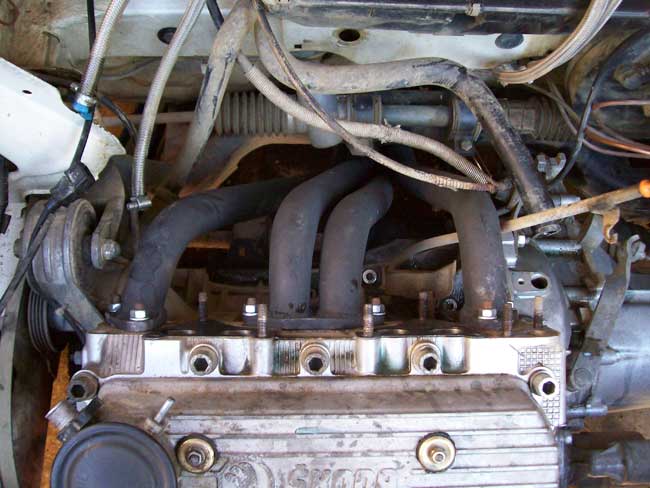
During the day, the fire extinguishers were delivered, and the engine turned up. I got back from work around half four, and unwrapped the engine. And to say the least, I was displeased. Despite speaking to the guy on the phone and being told that the engine I was getting was the one I’d seen on eBay, let’s play a bit of spot the difference, shall we? Here’s the engine on eBay:
Clearly a newly-built engine; the flywheel (on the left) is bright and shiny and hasn’t been used. The ports in the head (at the top) are clean, so it looks like this engine has never been run. Which was as it was advertised. This is what turned up.
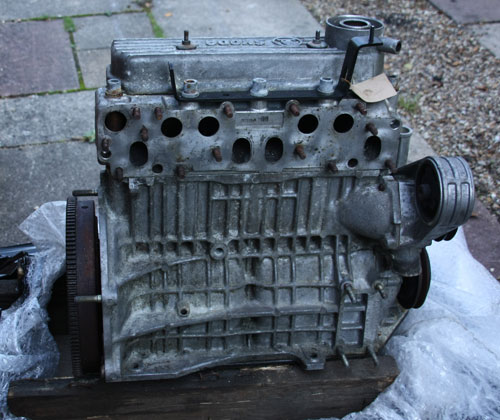
Clearly not what was advertised. Rusty, had been run, etc. This is an old engine, maybe worth £50. Certainly not worth anything to me. Long story short (after a heated phone call and some eBay based complaint action), it’s going back for a full refund, but I’ll still have wasted £50 on delivery to me. Displeased.
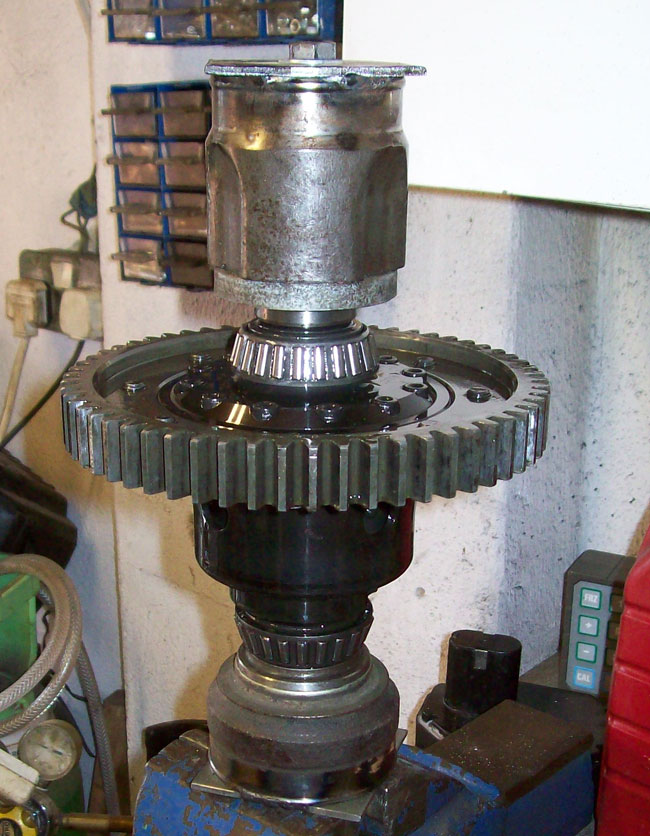
Still, move on, nothing to gain from dwelling on it. As the pistons etc had arrived, Plan A is back on track. The first part of this was to rebuild the diff to the correct preload. I’ve been fortunate enough to have some advice from the ever-excellent Steph Rowson from Motorsport Transmissions and with his guidance and the parts from gripper it was straightforward to get the diff to the right preload; all it took was one plate in the diff being replaced with a thicker one (I’d ordered all the sizes they have as they are only £3 each), and once reassembled it was working properly at the right torque (which will drop off a bit as the plates bed in). Splendid. Next, getting the box back together, which was easy enough too, particularly as I have a proper Skoda workshop manual for it.
Now just a bit of time to do some work on the bottom end of the engine. This was one I built in 2008 that had a cracked piston land; the bottom end itself other than that was fine, but I’ve changed the main bearings and put all that back together this evening, and it turns over a treat. It’s now got an ex-works cam in, and at present that’s how it’s stood; tomorrow afternoon I’ll get a couple of hours to work on it so I’ll have the horrible job of getting the liners fitted into the block and shimmed correctly – it was a real pain in the bum last time. Here’s hoping second time will be better.
Progress…
by Darren on Sep.27, 2011, under Build
… of a sort has happened. Not as much as I’d have liked, but some.
So, the deal was this; I’m waiting for engine parts to rebuild a bottom end to put into the car, and for plates to allow me to set the diff to the correct torque. Despite being told that they’d all been posted by both suppliers, it now transpires that they hadn’t. I was told that the engine parts had been sent on the 13th September. Turns out they were actually only posted (in the Czech Republic) on the 23rd (i.e. Friday just gone). No wonder I’ve wasted time waiting for parts to turn up. I have no idea when they will turn up, as the tracking number I’ve been given doesn’t work and the supplier in question has gone quiet. There are also some technical concerns as one part has been substituted so I don’t know if they’ll be the right clearance anyway. So, I needed another plan, and it should be arriving on Thursday, in the shape of an ex-dealer stock engine which is apparently rebuilt and unrun. It will need a new cam on it anyway (as I have a works cam I want to run in the car), and the head changing, so most of it will be inspected as a matter of course. It’s also an opportunity to get a new oil pump and a number of other parts into the bargain. Hopefully. All will be revealed on Thursday when it arrives and I have some time to check it all over. Yes, it’s out on a limb, but at this point I’m not in a position to go ‘all in’ given the delay that could happen with the parts I’d ordered.
As for the diff, it turns out the parts were only posted yesterday (as opposed to last Wednesday, which I was told they would be going out on when I ordered them), but they are at least here, so it should be a couple of hours’ work to get the diff set up to an appropriate breaking torque, and then get the box back together.
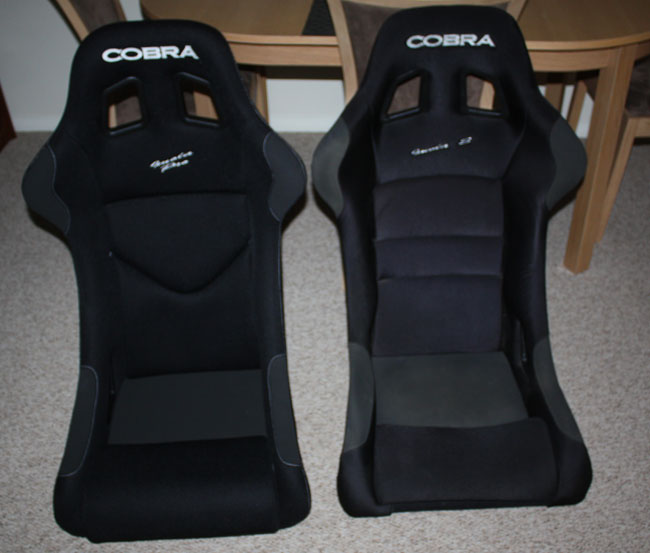
In the meantime, some suppliers have been good to their word. The ever-efficient Larkspeed have delivered the replacement driver’s seat (a Cobra Imola Pro, replacing the previous Imola S), on the day they said they would, bang on 9am. This is now bolted into the car, a 5-minute job which left me hoping everything else would be that easy (it won’t!).
Lifeline have serviced the 4.0ltr plumbed-in and 2.4ltr handheld extinguishers, and they will be back on Thursday too; another item which is just bolt-in and forget, which will be pleasant. Having to have perfectly good extinguishers serviced at a cost of £90 every two years isn’t (for FIA events they need to be tested and stickered by the manufacturer). I’ll check up on the rear shock rebuild status tomorrow, although I know Proflex were busy when I phoned them, and I’m not in a hurry for it back, but it’s another thing to not worry about.
Shiny!
by Darren on Sep.25, 2011, under Build
So, there were no new parts appearing this weekend, so I couldn’t do what I’d planned, build the new bottom end, sort the diff out and put it all back in the car. The parts I’ve sent off are where they need to be, being serviced (fire extinguishers) or rebuilt (rear damper). I’ve ordered the replacement driver’s seat, and put the other one on eBay to get some money back from the £400 it cost to replace it(!) – it’s in excellent condition, you’d really not think it had been in a rally car for 5 years.
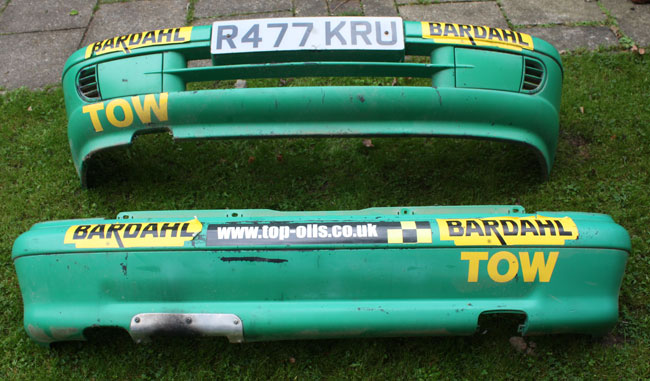
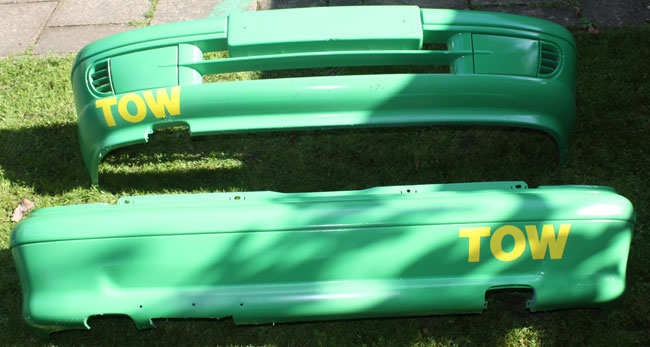
This left me wondering what to do, so I consulted the list, which is actually thankfully quite short; the bits above are just bolt in items, with the majority of the work being the engine and diff; the rest of the car has a number of little issues which need sorting, and I’ve ordered the parts for them, but one thing could be done – making the car look better by sorting out the bumpers; They were painted in 2008 (by me), and have never looked great. Two Rally GBs and sitting out side for nearly 3 years have not helped, with them scratched, rough and matt.
As I needed to remove some sponsorship stickers from them, this made them look even worse, as they took the paint off as they came off! I’d got the paint already (Signal Green, a ‘standard’ RAL colour, so it’s cheap and easily matched), so I cleaned them up and rubbed them down with fine paper to try to get the primer to stick. The primer is an old can (from when I built the car in 2007), and when I opened it up, it looked hideous. Stirring helped, but it had lots of lumps in, which isn’t good for spraying, so I filtered this out with a high-tech arrangement using an old sock! Looking at the thinners I thought I’d need to give up when I saw this:
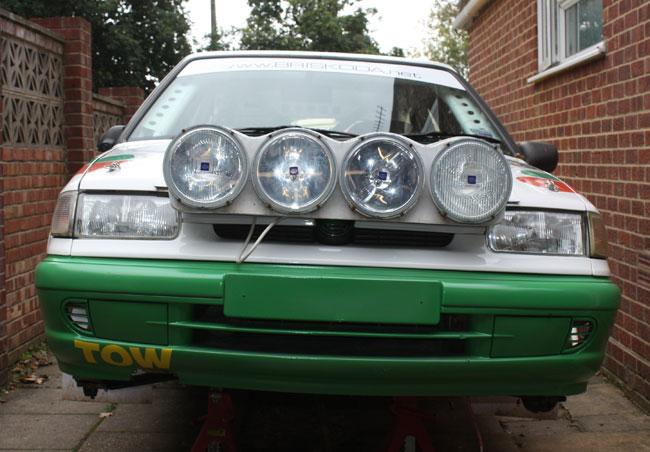
But I thought I’d ignore it and have a bash anyway. Primering went pretty well, spraying them off the car in the back garden as it was a nice day, and then I put the green on; it took a bit of experimentation with the mix to get it to spray well, but in the end I got it right and overall they look much better than they did before – not bad for a £25 paint job.
The pictures don’t show just how much better they look, and now they are back on the car (having welded replacement bolts for those that sheared off), it looks a lot better.
Now I just need an engine and gearbox in it!
HALT!
by Darren on Sep.23, 2011, under Build
There are many things that can go wrong with cars; they are complex devices with thousands of parts, and so everything doesn’t always go to plan. I am largely used to that. But I am, at present, not a happy bunny. I have tried to get everything sorted out for this weekend so I could build the new bottom end and get the engine in one piece, and also sort the diff out; in an ideal world this weekend I would even have got the engine back in the car, if not running.
But none of that is going to happen. Despite having originally asked for a quote on the engine parts over 3 weeks ago, and ordering them as soon as I got a reply, I do not have any of the parts I need for the bottom end, and the supplier hasn’t exactly been helpful in addressing the issue, simply saying “they’ve been sent”, and it can take “3-7 working days”. Given that it’s now been 9 working days, I’m not pleased. In addition the diff plates I ordered on Wednesday which I was told would be sent that day have also not arrived. Not impressed given that I’ve paid £9 for delivery on what is probably 300g in weight to deliver.
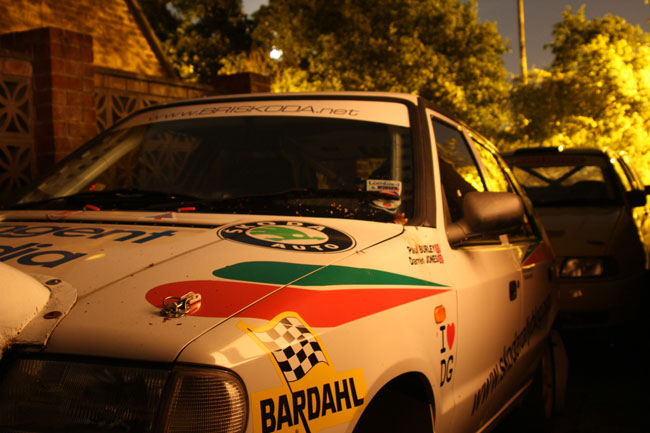
So this weekend there will not be much progress, and it’s pushed me back at least a week, more if the weather is bad next weekend; typically this weekend it will be good. I have a few jobs I can get on with on the car, such as painting the bumpers and sorting a few niggles out, but mostly it seems this weekend will be wasted as far as getting the car done is concerned. Did I mention that I’m not happy? Anyway, here’s my attempt at an arty shot, with the Skoda asleep in the drive at night.
Gearbox time!
by Darren on Sep.18, 2011, under Build
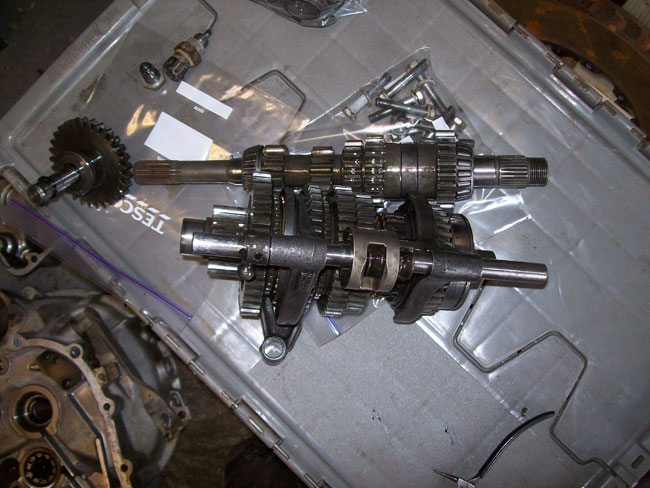
So, at the moment I have a bit of an enforced delay – I’m waiting for the pistons, liners and bearings to rebuild the bottom end of the engine. But one thing that I’ve never quite been happy with since I bought it is the Limited Slip Diff (LSD) that I have. Long-term readers may remember the DNF on Rallye Sunseeker 09 when the old LSD I had (which I never found the maker of) exploded on Stage 4, leading to a broken gearbox, an unhappy crew and a big bill. But the replacement Gripper diff has never really locked up in the same way that the previous one did, and as I have everything out, I thought it was time to investigate, so I stripped the gearbox to get access to it.
Again, long-term readers will remember that this is one of my least-favourite jobs on the car – splitting the gearbox is something I’ve never found too easy (and indeed I learned how to do it the hard way originally, making a right mess of the first box I attempted to dismantle). But with practice and a bit of thought then it becomes easier, and indeed when I got my Mum to hold a circlip open while I tried to move the casing it made it much easier – it was about 20 minutes to get the whole thing apart and the diff out.
Fortunately everything inside the box looks in good condition, and the problem on the Sunseeker with the oil leak (due to three bolts coming out as I’d not replaced the lower mount properly) had no effect on anything that I can see – all the bearings and gears look as they should do. An LSD is necessary in a performance car (yes, the Skoda!) to allow more grip and traction – the problem with a standard diff is that if one wheel has no grip (such as on mud, or in the air) then all the engine’s power will go to that wheel; I’m sure some of you have experienced this in a front wheel drive car when you try to turn and accelerate at the same time and the inner wheel just spins. The LSD stops this, but how much it does it by is part of its setup, and one thing you can measure is the pre-load on the diff, which is how much torque it takes to turn it. And the Gripper was set to 5ft/lb, which is WAY less than it should be, I believe (although I’m asking about as I’m not 100% sure) – I’ve read it should be more like 30-40 for my application.
So I set about taking the diff apart to see what was going on inside. I didn’t find anything of note, so I think this may be somewhat beyond me; if it was the kind of part you could take off and put on easily then I’d be willing to experiment, but it’s not for me, so I will be taking advice and possibly sending the diff off to get it set up correctly.
Other than that, no news really; I’m hoping to get the engine parts before next weekend, and get the engine built next weekend; I’d think the whole lot will be going back in the car the weekend after, which is largely on schedule. I’ll also be ordering the replacement drivers’ seat this week as well, which is the last significant expense (hopefully!) to get the car ready. Hopefully.
Better get cracking!
by Darren on Sep.15, 2011, under Build
I was reminded the other day (thanks Jon!) that it’s only 60 days to Rally GB. Or rather it was at the time. So I thought it was time to get my finger out and get the car ready, so I’ve set about sorting the list of things to do out. Fortunately the weather has been good today, and even more fortunately, I got the afternoon off completely out of the blue. So I thought it was time to get the engine and gearbox out, so I can get ready for the new bottom end to be mated to the head, and then put back in the car. Obviously I’ve done this a fair few times now and most of it has been on and off regularly, so I hoped that nothing would go wrong, and that was pretty much it. At 2:30 I drove the car into place, and by 4:45 this had happened:
I’d have done it in under 2 hours but I had a visitor for a while – it’s just like the Haynes manual, really – 1: Undo Bolts. 2: Remove Engine. I’m not going any further with stripping the engine down as it currently runs, and while I’ve had some of the engine parts turn up (OK, 2 gaskets!), I’ve not had any of the others (bearings, pistons, liners, shims, etc) – they are coming direct from the Czech republic courtesy of Jorily, so I’m hoping they’ll arrive during next week and I can get the engine built and refitted by the end of next weekend.
In the meantime, the rear shock has been sent off to Proflex to be repaired, I’ve bought and received a new Terratrip probe and the new straps to make the extinguisher legal (it will be sent off for service on Monday), so that should only leave the seat to buy, which will have to wait until I get paid at the end of the month – this self employed lark is all very well, but it makes it difficult over the summer! I also need to take a look at the diff as it’s not really got much preload on it so I want to beef it up a bit – nothing crazy, but it can do more than it currently is, for sure. I should get a chance to split the gearbox over the weekend and measure the current preload and then see what needs to be done – Gripper diffs have fairly cheap parts so even if it does need plates it won’t break the bank, thankfully.
Tonight I’ll be putting some areas on the car on eBay, so check out the Sponsorship page above if you’re interested and want to bag yourself somewhere on the car – the first space is already gone!
Wales Rally GB 2011!
by Darren on Sep.11, 2011, under Build
After having had a good think about it (and a few inspirational conversations), I thought it was worth giving a serious go at taking on Rally GB again this year; the car won’t be eligible forever (will it, FIA?), and there is precisely zero chance I’ll be able to afford a homologated car in the future; there look to be fewer and fewer options for affordable rallying at International level in the future, so this really could be it.
So, I made use of Bryan Hull’s excellent RallyMatcher website to see if anyone was interested in navigating with me this year. And fortunately after some further discussion it’s looking good, as I have Brynmor Pierce sitting in with me – he’s got loads of experience and is really keen to do Rally GB, and handily is from North Wales and knows a number of the stages like the back of his hand. He also lives near Llandudno which will make the logistics of the start of Recce and the start of the event much easier to deal with, something which I thought could have been a problem. In addition, he has a car which we can use for the recce, so it’s all looking good really. Just so you know who he is, he’s handily sent me “the cheesiest image possible”, so I shall put it here, with no comment other than that!
However, standing between us doing that in mid-November is some work on the car. As it stood at the beginning of the weekend, it wasn’t actually that bad; it runs and drives and I’d probably be happy to take on a one-day event in the car with a bit of minor re-prep, but I’d rather get the car just right (plus there’s one thing that definitely needed fixing as you will see in a bit). So, I’ve spent the weekend doing the car (in between the rain showers).
First issue was the exhaust, or more precisely the exhaust manifold. This has been a hideous bugbear since the car was built in 2007; it was bought from “The Idiot”, and as such was a badly-beaten and bodged-back-together collection of tubes that never fitted particularly well, and which leaked – from a couple of places that were inaccessible due to the way the four tubes met, plus the joint to the system was always a terrible sliding joint that both rattled and leaked. Really not good, but always the kind of thing I tolerated and never got round to fixing. However, a while ago I bought a nice ex-kit car manifold from James Johns (who is rebuilding his Felicia and has gone for a very nice stainless replacement for it), and now was the time to fit it. This may sound straightforward, but it’s not for two reasons; firstly removing the old manifold meant fully removing the old system and loosening the engine mountings and swinging the engine forwards to get enough room to remove it (it’s a large single piece of pipework), and then the system needed to be modified slightly to fit the new joint (which has a proper flange instead of a horrific sliding affair which leaked like a sieve). This meant I needed to get my TIG welding kit out (as the system is stainless), and to make a nice job of it took most of a day, with measurements,modification and checking it all on the car before final welding up and refitting. And that’s a day’s work which in between the showers meant it didn’t get fitted until this morning.
Dutifully as soon as it was fitted, the car fired up, and it was definitely a case of good and bad; the good news was that the exhaust didn’t leak at all, and didn’t rattle – it’s spot on. The bad news is that this now meant I could hear just how rattly the engine is! The bottom end was already down for a rebuild as it’s sounded very tired towards the end of the last two events that it’s done, so right after this everything will be ordered to rebuild it, hopefully to be fitted in a couple of weekends’ time.
Next up was the issue that definitely needed doing – the left rear Proflex shock has sprung a leak! It has leaked oil while the car has been stood up, and it looks like the union from the reservoir to the shock body is leaking, so that will need to be sent off for a re-oil and gas; not hugely expensive, but probably north of £100. So that was removed and stripped ready to be sent off, and a standard one refitted to keep the car rolling.
After that I replaced the old Terratrip 303 with a 404 that I got cheap on eBay which seems to work OK (and better than the 303 which was at best erratic!). Again, should be straightforward but as the mounting holes are in different places meant an hour rather than 10 minutes. And then I just went round the car to make a list of things that need to be bought, serviced or replaced. The list at present looks like this:
- Rebuild spare bottom end and fit to car
- Replace Driver’s Seat (as it’s now out of date)
- Replace Plumbed-In extinguisher Mountings (FIA rules have changed on this)
- Get both extinguishers serviced (they need to be done every 2 years)
- Get rear damper re-built
On top of that there’s a bunch of cosmetic stuff, but that’s not too bad a list – Aside from the bottom end rebuild everything else is a straightforward “pay for something and then bolt it back on in very little time” – obviously there’s a fair bit of money to spend there (about £700, I think), but it’s not too big in terms of hours aside from the engine rebuild.
So, all systems go, I think! More to follow as soon as I know more details, or have taken some pictures of something.
Lots of things get done!
by Darren on Feb.06, 2011, under Build
The next job to get done was the tank guard – the last one died rather a death on the last day of Rally GB, although given that it was made in haste during Rally GB 08 after excellent scavenging by Ian Bowler (it was a piece of an Army toolkit!), it didn’t really owe us anything! I had one here which was part of the job lot of bits I bought years ago (and the only part I’ve never used), but it wouldn’t fit straight on; partly because of my handbrake cables (the car it came off of didn’t have a cable handbrake), and partly because my exhaust mountings are a bit different, so a bit of modification was needed at the front, plus making up the front mountings. The rear is also mounted to the body (unlike the last ones which have been axle-mounted), so those brackets needed sorting out, which isn’t straightforward when you’re trying to juggle two things at once that you can’t hold properly or see, and when you’re getting facefulls of dirt from the underside of the car – there were several “blind” moments, but eventually the rear brackets were made up and fitted, so they needed to come off and be painted and left overnight.
This morning it all went back together and then was put onto the car, and that part went pretty smoothly (barring several gritty eye moments), and the back of the car was looking pretty good.
Then it was time to look at the front – a new gearbox mounting has arrived, having been made by Jim Jones who is a Skoda legend and all round good bloke – if he doesn’t know it about Skodas, it’s not worth knowing.
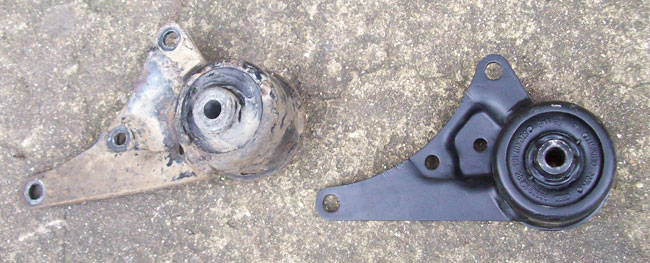
This uses a Skoda bush from a Fabia to significantly improve this lower mounting, which had given up the ghost on Rally GB, mostly down to the on/off throttle problem giving it a hard time. That was a fairly simple job to fit, although different bolts will be needed for a permanent fitting.
Typically, though, it’s time for an MOT for the Felicia, and a quick check showed that one of the inner CV boots was a bit split. Closer inspection showed that the inner joint had got some grit in it and was worn, so it was time to change driveshaft, thankfully I have a few stored in the shed, but it does of course mean getting the strut out the way, so that all takes time, and then draining the gearbox oil out (which needed to be re-used as it’s the very good Bardahl stuff which worked a treat and would cost about £40 to replace!), etc…. Easy enough, but all takes time, so by the time this was all done, it was time to stop for the weekend. The car is pretty much ready for the MOT which I will book this week, probably for the week after – it’s quite difficult finding time at the moment, so I’ll need to get it done on a Friday afternoon as I don’t have any other time when I can get there. Hopefully it’ll all go smoothly!
Tank time
by Darren on Feb.01, 2011, under Build
Sunday was left with the car back on its wheels, but not running because of a major fuel leak. The hose between the tank outlet and the fuel pipe that goes through the car had a leak, so it needed replacing. This wasn’t something I was looking forward to as it’s really awkward physically both in terms of access and also getting the job done as the pipes are really jammed in there, and I remember how much I disliked doing it before, so I decided to make it a bit easier by dropping the tank down a few inches – this needed to be done anyway as the new tankguard mountings need sorting out, and it will attach where the front mountings for the tank are. Getting them off wasn’t too hard, but a bit awkward as the exhaust mounting is in the way and the studs were considerably extended to let the old tank guard mount there, so lots of messing about was needed to get it off, but once it did, it moved down about 4″, and then from inside the car it was actually possible to replace the hoses, which took a lot less than before – even taking into account taking the tank mountings off it would still be quicker this way than the “struggle” method. Once they were done, I thought I’d have a laugh and see if the car would start, and amazingly enough it did – fired up pretty easily and sounded reasonably healthy. Things seem to be looking up! I left it there as it was teatime and pitch black by then, but that’s good progress for a bit of time after work.
In other news, my entry for the Sunseeker has been accepted, which is good, although the entry levels look pretty low at the moment – there are only 43 entries as I write this, which is really disappointing. I’m also not sure if Paul will be doing it, so that’s another hurdle to cross…. Anyway, it’ll all come together in the end, I’m sure!
Back on its wheels
by Darren on Jan.30, 2011, under Build
After a few weekends where I couldn’t get anything done on the car, I’ve had a bit of time today to get the car back together in one piece. This meant fitting the front and rear suspension as the first task, and that should be simple enough, but there has been a bit of a problem, and that is the location of the rear shock remote reservoirs; the hoses aren’t long enough to put them in the middle of the beam where they will be safe from (most) harm, hence the breakage before. To route the hose correctly meant the reservoir would be in a very vulnerable place on the rear axle, so it needed to go elsewhere. After asking about and trying a few things out, I’ve come to the temporary solution of them being secured along the rear chassis rail, behind the shocks and near the rear bumper. There’s a convenient slot in the chassis rail already, meaning they could be fitted using a jubilee clip with no drilling, so that was fairly straightforward. What wasn’t was finding several small missing parts from the upper mounts (which use the standard car parts), but after an hour’s searching in the garage I found the bits I was looking for, stored from another car I broke. There was also a bit of guidance needed for the rear shock hose to keep them away from the tyre, so this all took a fair bit longer than I’d have liked, but is all looking good.
The front end needed just refitting, which still takes a bit of time as the angles of the struts needs to be right – they need to be in the right place in relation to the hubs so that turning the steering doesn’t make the hoses foul too much, and they also need a fair bit of effort to get them in place as the proflex strut bottoms are slightly bigger than standard so they’re not a straight fit. A few attempts got them all lined up and fitted, so the car should be ready to go back on its wheels for the first time in a couple of months, aside from…. the front brakes. Which were in need of new pads, as inspection after Rally GB showed the Mintex 1144 pads had broken up quite badly, so handily I had some EBC GreenStuff pads knocking about (again, after a fair bit of searching), and these didn’t take too long to fit and clean up the calipers, so the brakes should be a lot better than they were. Wheels back on, sumpguard off, and I thought I’d try to start it up.
As soon as I did, I could smell petrol, and the hose between the tank and the rigid line on the car has broken, leaving a pool of fuel on the floor, and a disgruntled owner. I don’t have any hose, plus I was feeling pretty sore by this time so I decided it would be best to leave it for the day; the tank needs to come off anyway to let me fit the new tankguard so it’s no big deal; it can be done next weekend, and then the car should be ready for an MOT and then a week of prep before the Sunseeker.
