Build
Resurrection
by Darren on Apr.02, 2012, under Skoda
It’s been a while since the Felicia has been used – in fact, I think aside from moving out of the way of the Seat when it was in the ‘Number One’ position in the drive, I don’t think it’s been used since October – once the engine was all sorted out and I’d done some mapping on it, it was put to bed. However, I have the next couple of weeks off, and one of the things I want to get sorted out is the Skoda – get it MOT-ed and sort out the list of issues it has; in essence get it ready for its next event.
First, there was a problem – not with the Felicia – in that the Ibiza wouldn’t start. Or do anything. It had done this before, and the battery was weak when I got it, and hasn’t improved since. Time for a trip to the MDC and to get a new one, and off it went. Then, time to get the Skoda out, up on ramps and take a look at a few issues that I knew about.
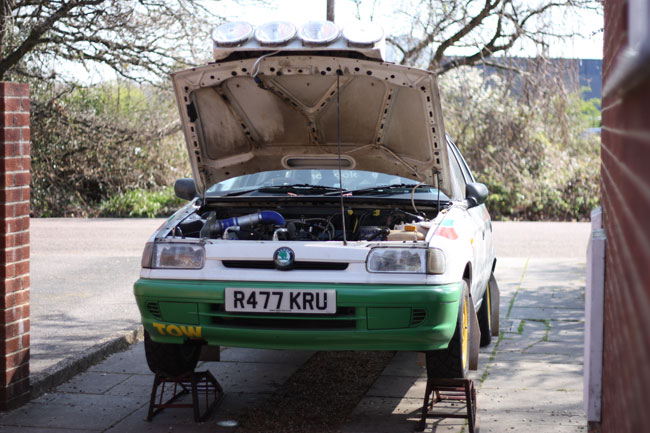
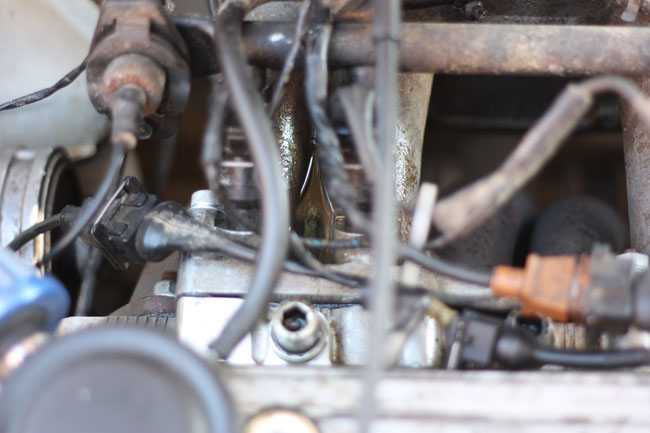
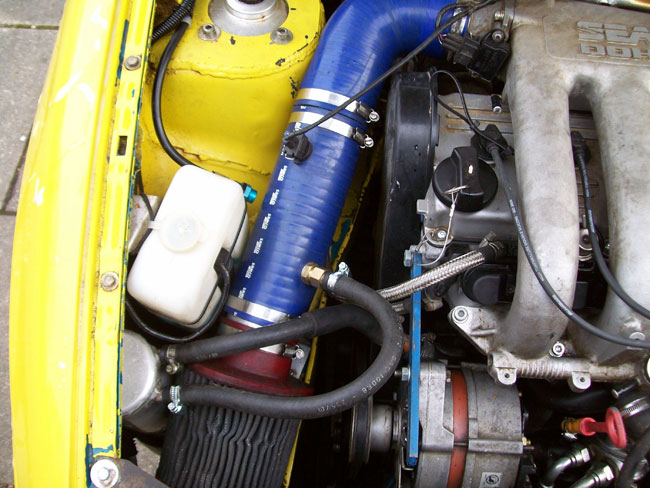
Once I got the bonnet up, I noticed there was a bit of a smell of petrol, and a quick look showed why – there was loads of it leaking out of the fuel pipes, pooling nicely on the inlet manifold:
Oh dear. Still, nothing too difficult to fix, so off to the shop up the road to get some more braided steel fuel hose, and all the bits under the bonnet were replaced. No more leaks there. A look underneath showed some gearbox oil leaking because the reverse light switch was loose, so that was easily fixed. Everything else looked OK underneath, so it was run up and left for a few minutes, and nothing else undesirable fell out or off, so that was good. Everything for the MOT was checked over and seemed OK, all the lights work as they should do, and nothing seemed too bad. Splendid.
Ages ago I’d made up a list of things to do, and some couldn’t be done as I need parts, but one could be; a while ago I replaced the hoses between the fuel tank and the rigid pipes in the car, and I didn’t think too much about the routing of the pipes, leading them to be in the way of the inspection cover in the car’s floor. The access to them is really difficult, and to do it properly meant replacing one of the pipes, meaning the tank needed to be dropped down, so the back of the car was up on ramps and then tankguard needed to come off, then the tank dropped down, hoses replaced and all back in place (minus about 4 kilos of stones which were on top of the tankguard). Sounds simple enough (and it was), but still took over an hour.
The MOT is booked for tomorrow afternoon, so it should be straightforward, aside from one thing – the car has next to no fuel in it, so I’m hoping that after the UK’s panic buying of fuel last week there will be a petrol station nearby that has petrol so that I can actually get to the MOT!
Good news!
by Darren on Mar.11, 2012, under Seat
Last time out, the damage list was driveshaft (already replaced with a standard one), power steering pump (and possibly the rack) and the missing fuel cap of woe.
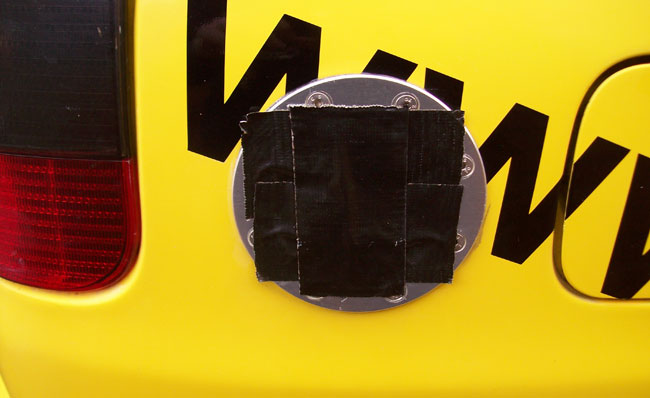
This week I’ve been at work and had a fair bit on this weekend as well, but I’ve managed to make some progress. The first bit of which was nice and easy to fit. Before:
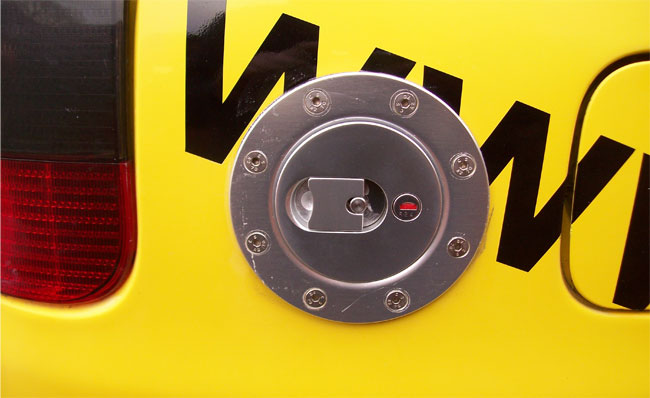
My lovely bodge with gaffa tape. However, thanks to a very helpful Matt from Think Automotive I now have a nice new cap:
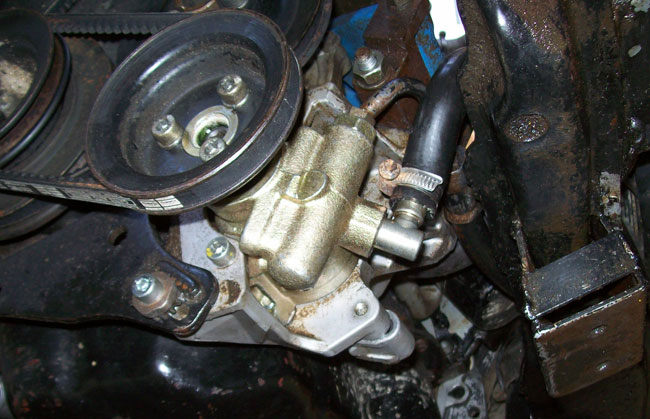
The big upside of this is that it cost far less than I thought – £65 in total. Not cheap for a fuel cap, but a lot less than I originally thought! Next up, the power steering. I ordered a new pump, which needed a bit of modification as the inlet was at a different angle. It took a bit of doing to get the inlet out of the new pump, but the old one was easy enough. With a bit of work, it looked like this:
I filled it up with the right fluid, and thankfully it seems that the rack hasn’t been damaged – it seems fine from lock to lock, and now the car is back as it was. However, I want to avoid another broken shaft so I’m now looking into getting some stronger shafts made, so hopefully by next weekend I should have some definite news on this. Work will be starting on the Skoda soon though, as it is next up, in September, with any luck.
So, what’s the damage?
by Darren on Mar.04, 2012, under Seat
Since last week, I’ve had a bit of time to spend on the car, cleaning it up and assessing what’s needed. Here’s what I found:
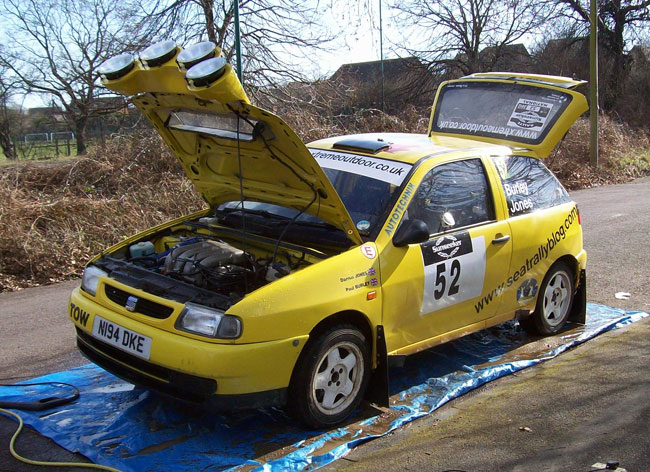
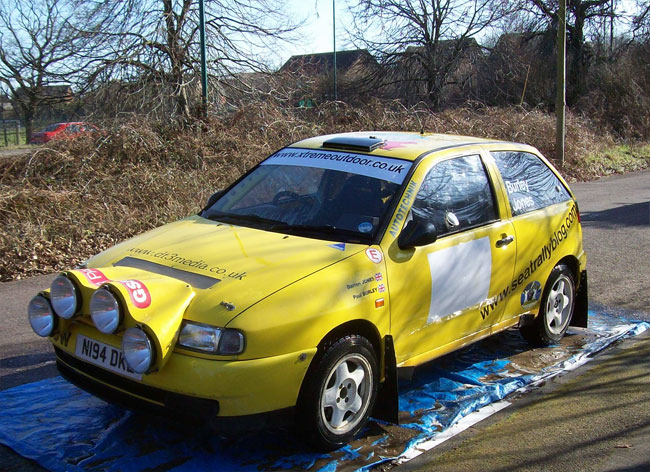
Firstly, cleanup – this didn’t take as long as last year – the roads were much dryer than before, so it ‘only’ took about 2 hours to jetwash the car off – there’s still a great deal of mud stuck to the car, even when it doesn’t look too dirty. Obviously I don’t want to leave all that there as the car won’t be seeing much use in the foreseeable future, so it needs to be as clean as possible. Last year it took me ages to clean all the mud off the road, so I decided to do it on a tarpaulin this year to make it easier:
And once it was all done, and de-stickered, looked much better:
Next up, assessing the damage. The first thing was looking at the driveshaft, which had sheared off where it goes into the outer CV joint. Once I’d removed the boot, the CV just fell off, revealing this:
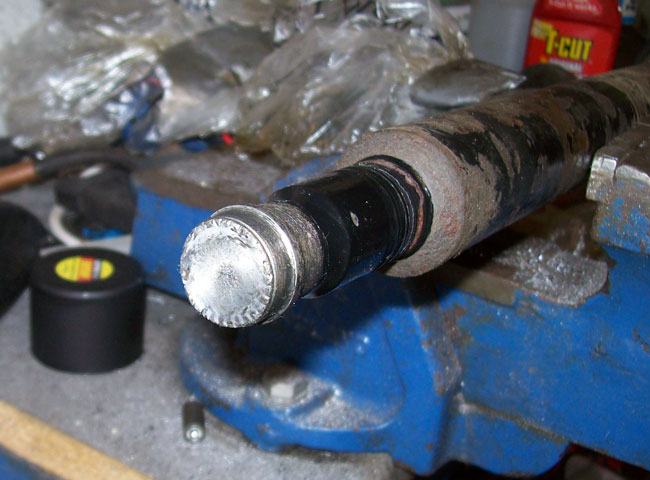
A cleanly sheared off shaft, just twisted off at the end. Once I’d taken the outer CV apart, I got the end bit out, which was a little more revealing:
As you can see, the splines are twisted, and the shaft has just said “enough” and broken off. I’ve done some asking around and had some helpful advice and info from people on britishrally.co.uk and the general consensus is to fit new shafts and life them, stripping and examining after each event. However, one guy has a Golf which uses the same shafts, and he had a similar failure on a brand new shaft with only 300 miles on it. I am still unsure what to do, but there’s no immediate rush; I will look into the possibility of getting some stronger shafts made up as I don’t want to suffer a DNF on the car’s next outing (which may well be Sunseeker 2013, alas!).
Other than that, it was time to see what happened to the power steering pump; while moving the car about, I realised the power steering had failed again, and saw there was no fluid left in the reservoir. I was surprised to see that the loose union wasn’t the cause of this second failure, it was another problem – the low pressure feed into the pump had a cut in it, so that’s something else to look at. The pump, however, is dead – it was whining like hell after refilling as I had expected, so I am hoping the damage is just down to that and not the rack as well. Time to order a new pump, which shouldn’t be too expensive. Or rather won’t, once I’ve found out what it is, as the pump isn’t one from an Ibiza 16v, according to the books I have seen, as the inlet is at a different angle…. a bit of experimentation is in order.
And aside from a few bits an pieces, that’s it really. At ‘normal’ prices, the damage from the Sunseeker is as follows:
Power steering pump: £80
Driveshaft: £70
Lost fuel cap £150.
So, with a stupid error, I’ve pretty much doubled the cost of getting the car back up and running. D’oh.
Done!
by Darren on Feb.16, 2012, under Seat
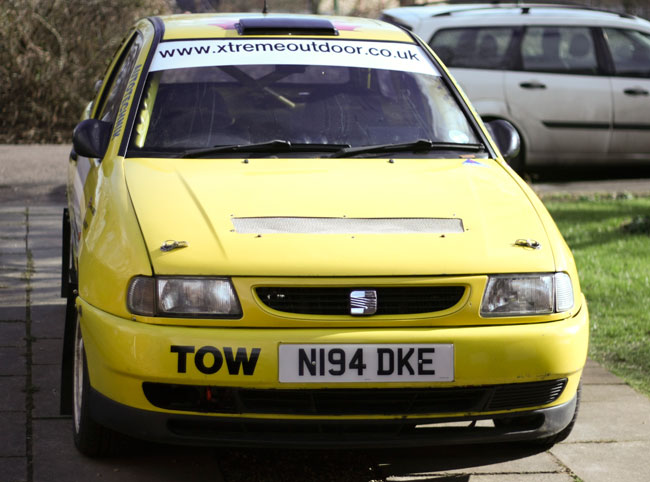
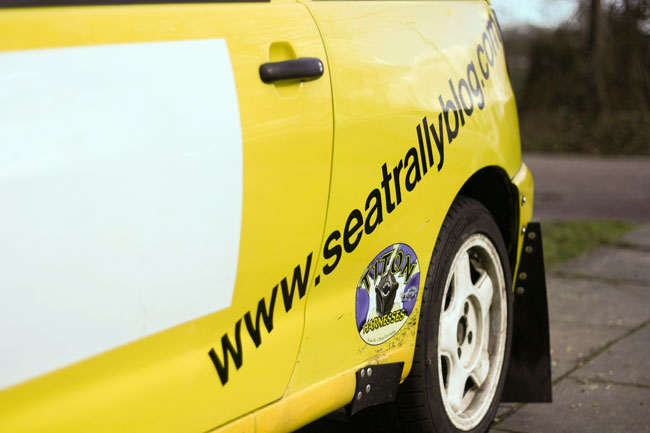
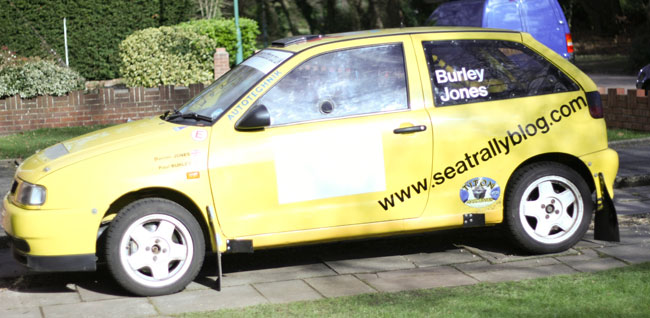
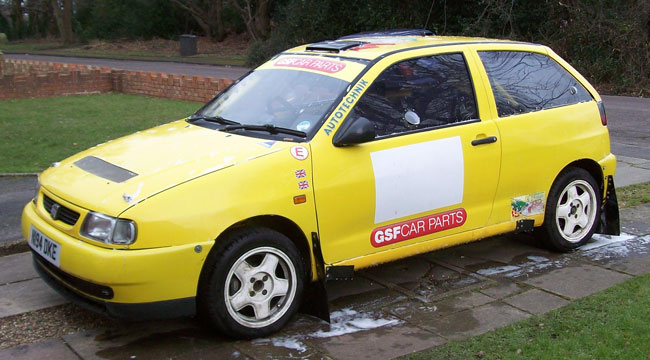
No rally car looks complete without stickers. And having removed all the blue ones from before, it was time to get some nice ones back on there. I don’t have much in the way of sponsorship, so it was time to do some self-promotion, as well as promote Xtreme Outdoor, who sell kayaks, skate and scooter gear and whose owner Mark has lent me his van on a number of occasions! In addition the car was looking quite drab and dull as the paint has faded a fair bit, so I spent most of the day polishing it and then applying the stickers which Andy has as ever provided in next to no time. Removing old sticker goo takes ages – even more so when it’s on a plastic window that you don’t want to scratch. But I think the end results are worth it:
I’m hoping the TOW sticker isn’t too inconspicuous.
Titon harnesses – both an advert and a gravel rash cover.
Eagle-eyed readers will note that the tyres are not the right ones – these are road-going winter tyres, which I’ve been shedding about while I get everything sorted out on the car. These have now been swapped for some more suitable gravel rubber which will do the trick. While I was playing about with the car I decided to clean the interior – it looks nice and clean in there now, as clean as it can be without a paintjob, and I’ve also reprogrammed the dash and cleared its memory; it’s an Aim MyChron 3 Plus, which is about £500-worth. At present it’s being used as a rev counter and speedo only, so it’s a bit under-employed. The speedo bit works fine when on the go, but when at a standstill it comes up with spurious figures, so I’ll need to check this out at some point. However, I have calibrated it correctly so it reads the right speed when on the go – previously it was miles out. I’ve turned off the gear display as while I like the geekiness of it, having a red digit flashing on and off on the dashboard is not conducive to a relaxed drive – I spent half an hour or so repogramming the dash to try to get it to work, but ultimately it clearly needs a better speedo signal than the one it’s getting at the moment, and if I need to look at the dash to know what gear I’m in when driving a car with an H-pattern box then I have more serious issues than that anyway!
So that really is it. The car is ready to rally as it stands right now. I’m going to have an entire weekend off from doing it or anything to do with it. Well, I say that, I bet something pops up that I think I need to fix.
This morning I was visited by a couple of students from Southampton Uni who wanted to interview me; they brought a camera over and interviewed me in the drive while in front of the car; when I get the footage I will post it here (providing I didn’t babble too much). I’m hoping to get a new tracking device fitted to the car in time for the event as a friend runs a company doing these systems, but I’ll have to get hold of him. And then spend the weekend working on the car!
Are we there yet?
by Darren on Feb.13, 2012, under Seat
Last time out I had a small list of things to complete, and I’d bought everything to do it. The original plan was to complete this on Saturday, but unfortunately real life got in the way of that, so I had to spend the weekend looking after Tammie who’d hurt her back for the first time ever. Fortunately she’s OK now and even more fortunately I have this week off, so I’ve spent today finishing off all the little things on my list in the garage.
The first thing was to sort out the breather arrangement – it had been bodged together previously and looked very dodgy, so a quick trip to Thread and Pipe up the road saw the correct fitting added to the inlet hose, and then the setup all finished off – now any breathed gas will be fed back into the inlet, as it should be. The engine doesn’t breathe at all heavily, however, so that’s all good.
Next up, an oil change, and for this I needed to drive the car for a bit, and for that I needed to put some fuel in, so a handy time to calibrate the fuel gauge. What wasn’t so handy was that putting 10 litres in made no difference to the fuel gauge reading. 20 litres registered an extra 1/8 on the gauge, so clearly it’s not up to scratch, and I’ll need to work on it in the future. For now, though, I’ll have to run a large reserve of fuel and try not to run out on the Sunseeker. Hmm. While out and about, I made use of a local half-mile marker to calibrate the Terratrip which now works flawlessly. I’ve said this before, and then had them die on the day, so we’ll see if the 404 is any better than previous ones!
On the upside, the car drives like a pussycat – granted the clutch is heavy and binary in operation, and it’s not a quiet shopping car, but it’s very pleasant in traffic and will be a nice relaxing drive in between stages. Once the oil was up to temperature, back to take the sumpguard off and do an oilchange which was routine, but a chance to do a spanner check on everything underneath, which was all as it should be. The thing that is really odd about the Seat is that most of it is really well built and seems professional – lockwired fasteners, well-made rigid pipes, etc., and now and again I come across something which just seems out of place; the sumpguard has a shield on one side which is a bit of mudflap material, and it was held to the sumpguard with nuts and bolts, which would be really hard to get to in practice – meaning you’d have to remove it from the chassis rail instead when you remove the sumpguard, which is a pain too. I replaced the nuts and bolts with rivnuts, and now it’ll be a piece of cake to take off, and still keep the mud and stones out of the engine bay.
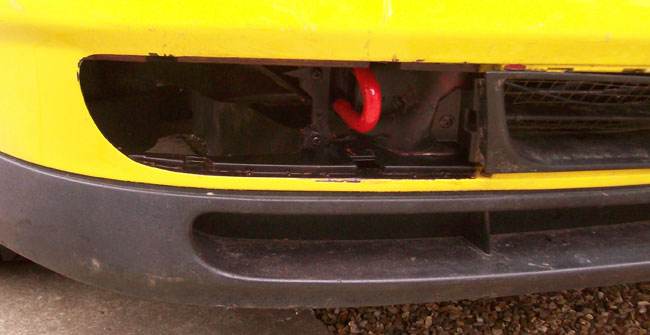
The rest was just bits and pieces – the towing eyes were not a “contrasting colour”, and it’s difficult to contrast with Council Yellow, but I’ve done it with Hammerite Red – helped at the front by painting the surround in matt black; the bumper on the car had been repainted from the original red and in this area it was a right mess; painting this not only highlights the towing eye, but also stops the front of the car looking like a piece of scrap:
It looks better at 30 paces, honestly.
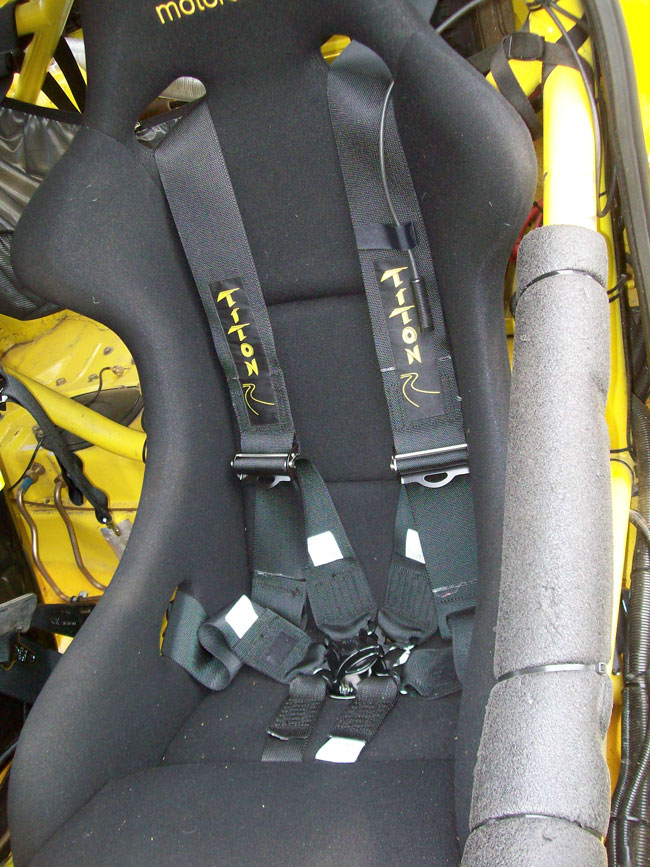
The harnesses are now fitted into the car, and you can see how neatly the bit of velcro keeps the intercom cable in place. As I said on Friday, I’m really pleased with these, I hope Prima have a lot of orders now that FIA harnesses are the norm for rally cars.
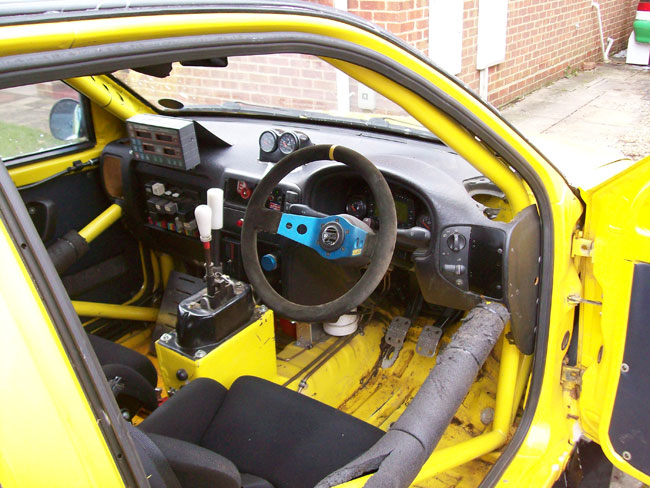
And where I sit is ready to go – everything is back in place, and looks great; all the controls work as they should.
And that is just about it. Everything is crossed off of the “To Do” list – the car is ready to rally as it stands in the drive, right now. There are a couple of cosmetic things to attend to – it needs stickers which have been sent today, and it needs a polish as it’s rather dull-looking, but that can wait for Wednesday or Thursday. I actually feel a bit weird as the car is ready so early! Anyway, as it stands, here it is:
Just need to change the tyres and job’s a good ‘un.
Titon Harnesses
by Darren on Feb.10, 2012, under Seat
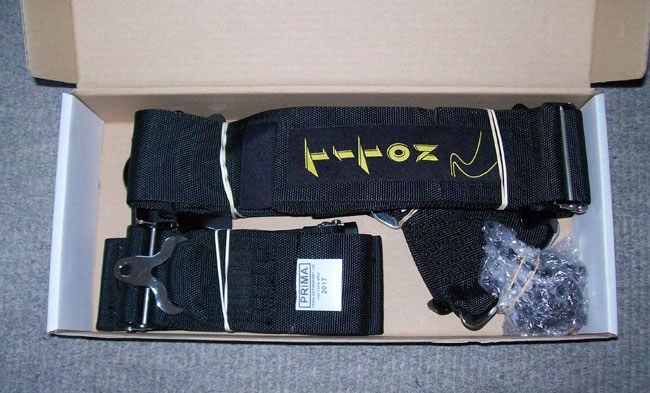
Rallying is expensive. There is no way around it. But it’s made more expensive by some of the rules, which are under some dispute at the moment; while I got caught replacing the Ibiza’s seats shortly before the rule to make currently-FIA homologated seats (which means under 5 years old, at a cost of around £550 for a pair in my case, sometimes a lot more) compulsory was suspended, one thing that hasn’t changed is the requirement for in-date FIA harnesses. The ones in the Ibiza ran out at the end of 2011, which means that despite being completely serviceable and in good condition, they have to be replaced, adding to the considerable cost of rallying. They’re not cheap, and previously I have used Sabelt ones in the Skoda and they came in the Seat as well, but there is a local company called Prima Motorsport who make FIA-homologated harnesses, so I thought I’d do the decent thing and give them a try; I ordered them a couple of weeks ago but couldn’t pick them up until today. They came in a nice neat little box:
Opening them up revealed what I’d ordered – a harness with ends suitable to be wrap-mounted over the harness bars on the roll cage, which is a nice neat option and offers better angle of the strap over the shoulders.
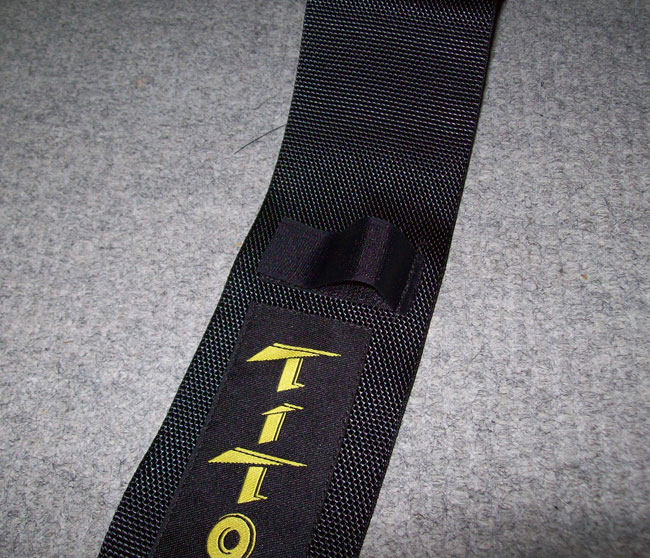
On inspection, they were every bit as good as any of the higher-priced alternatives that I’ve used before, and indeed come with a really nice little touch – often it’s a pain to get your intercom cable to stay in the right place, but with a neatly-done bit of velcro (already added so with no scrutiny issues), it’ll be a piece of cake:
They came with a very clear instruction sheet, which shows the right way to install the wrap-over harnesses. When I removed the old ones I found that they hadn’t actually been fitted very cleverly, and the way the new ones are in will work much better. Setting them to the right length was a piece of cake (and easier than with other types I’ve done before), so overall, I have to say I’m really impressed with Prima’s harnesses – aside from the price and service (both of which were excellent), the product is great too. Obviously I’d rather not have to spend over £200 on a pair of harnesses that may only get used for 10 days in their lifetime, but with the obligation to do so it’s nice to know that my money has gone to a small and decent local business. Sermon over!
Every cloud…
by Darren on Feb.08, 2012, under Build, Seat
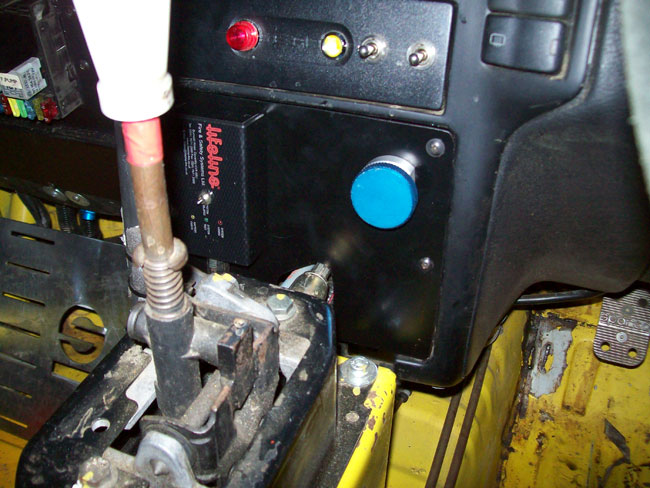
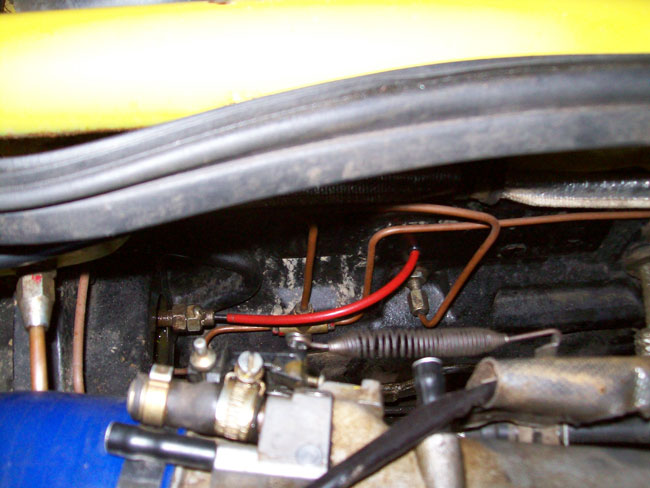
… has a silver lining. And today’s cloud was being off work! One of the schools I work at is a boarding school, and they had a dose of a vomiting virus, so they have closed the school. Which means I get a day off (yay!), but means I don’t get paid (boo!). However, there is no peace for the wicked, so I thought I’d make some use of today and get some more ticks done on the Ibiza’s “to do list”. Top of the list was the bias adjuster – I’d made the new plate up for the dashboard and painted it, but it needed fitting, and to do that I also needed to drill a small hole in the bulkhead for the adjuster cable to pass through. There’s not a lot of room in there to do it, or much access with the roll cage in the way, but thankfully due to a small air drill and clearance under the bonnet drilling the hole was easy enough, as was fitting a grommet and getting the cable through. With it all screwed in place and connected up, the brakes are now adjustable from the cockpit, should that be necessary.
That’s the blue knob, which is turned to adjust the bias front and rear.
The red cable is the adjuster, which connects to the bias pedalbox which is seen on the left. Straightforward really (now it works!)
Next up, the terratrip. While I’d managed to fix the keypad on it, the battery inside it looked fit to explode, so I’d ordered a replacement Ni-Cad one, and fitted it without one in the meantime. The problem with this was twofold – firstly, whoever fitted the thing in the first place connected it to a switched live, so when you turn the ignition off, the trip meter goes off. Not a great idea, and secondly without the battery when you turn the engine over it has a tendency to wipe the terratrip memory out. Taking it all out of the car and apart again was a bit long-winded, and having “lost” the batteries I ordered made the job even longer; I’d actually put them in the “bits to fit” area of the garage and forgotten about it. Still, easily fixed, and soon enough a permanent live feed (although still cut off by the kill switch for obvious reasons) was wired in, fused and everything. With it all back together and the battery charged up for a while, it all worked as it should do, keeping time whether the car was on or off.
After the tank exploration last time out, I still had to re-fit the cover for the filler pipe. This, too, turned out to be remarkably easy, just taking a bit of care to do it had it fitted in a few minutes. Another thing taken off the list!
Next up was the guard for the alternator and power steering belt – I have no idea how it was supposed to fit with the sumpguard as it just didn’t fit – whichever you fitted first, the plastic guard just didn’t work properly, and looked more of a danger than a help, so I took it off and cut it down. Refitting it to the car showed I’d taken a bit too much off, but this was cured by heating it up with a hot air gun and bending it to suit the sumpguard.
While not a watertight seal, it is intended to keep stones out of a critical area, and looks to be doing just that. I may find a way to fix it to the sumpguard with a couple of screws/rivnuts to ensure it’s easy enough to remove but will stay perfectly in place; the other side has some mudflap material which needs the same treatment as previously it was held on with nuts and bolts (which must have been a real nightmare if you needed to do something quickly!), so when I come to do the oil change at the weekend, it will get all that done to it.
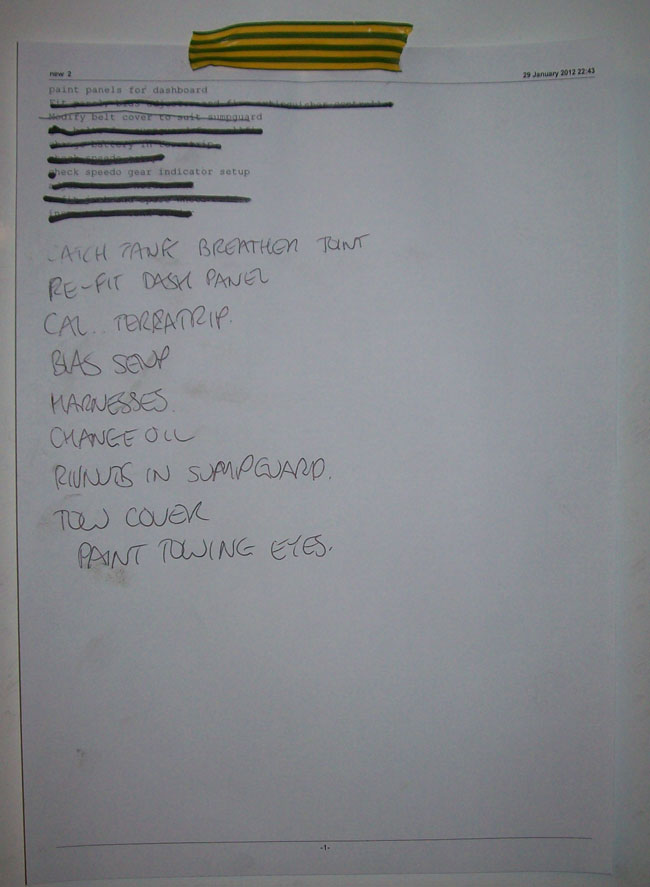
And that is about it! Doesn’t seem like there’s 5 hours work there, but with all the messing about that’s needed and going to buy parts (three trips to the shops, each time for tiny things), it all adds up. Still, the list now looks like this:
Which is a bit odd – I’ve done 8 things today, but added 9 to it. That’s progress for you! Seriously though, most of those things are straightforward. I reckon a few hours will see everything ready for the car’s first trip out on Rallye Sunseeker, entry for which was confirmed today by the organisers. There look to be a few entries in our class, so we will no doubt be slower than everyone else… or will we?
Cracking time part 2
by Darren on Feb.02, 2012, under Seat
Having the joy of a day off…. I decided to spend it working on the Seat! I have a small list of things that are needed before the Sunseeker, and although none of them are drastic, they’re all the sort of thing that can make the difference between a smooth fun day out and spending the day with bits all over the place and each service patching the car back together.
With that in mind, I thought i’d tackle the most difficult bit first, the fuel tank. While the fuel gauge seemed to work, I wanted to check it out fully, and while I was at it I wanted to check what condition the tank was in – it’s in an aluminium box in the back of the car (as per regs), and I had no idea what it was like inside there. It was a bit of a mystery how to get into it, as it’s quite well sealed up, with an aluminium tube between the filler and the box as well, and it took a fair bit of working out before it was all apart, but it was a pleasant surprise to find this:
One ATL tank – I had expected something with a composite outer and a bag inside, so I was pleased to see something less exotic which is less likely to give any trouble. Splendid. Next up was the sender – the silver disc at the bottom left of the blue access panel above – which I removed to check what the fuel gauge would read when the tank was empty. And it turned out it was worth all this effort – it actually shows about 1/8 on the gauge, which wasn’t what I was expecting. It would have been easy enough to run the car dry on the day, so now I know. I also know that when full it will show full, and that all the gubbins inside the case is in good nick. Putting it all back together was simple enough, thankfully.
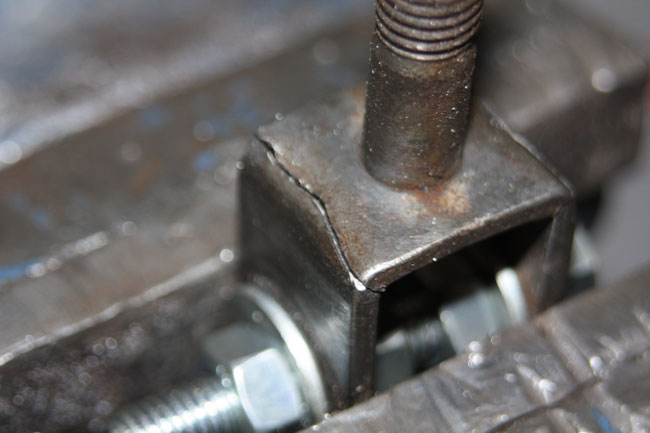
While having a nose around underneath and replacing the sumpguard bolts, I noticed that one of the anti-roll bar ends was cracked; this was fine when the car was MOTed, but it was now in need of a fix. Once removed and cleaned up, it looked like this:
Easily fixed, but still would have been a problem if missed. 10 minutes’ welding saw it all fixed and once cooled back in the car.
Next up, the bias adjuster mounting plate. The original dash panels were a bit rubbish and bodged, so I made a new one piece one up out of aluminium and then painted it. The mountings in the dash still need to be sorted out, but it’ll be a lot better than what was there, and plus the brakes will actually be adjustable which is part of the point of having a bias box in the first place.
I’ve put an entry in for the Sunseeker, which is only a few weeks away, and the list is getting shorter, thankfully.
Brake Time
by Darren on Jan.21, 2012, under Build, Seat
With the Sunseeker coming up in just 5 weeks time, some progress was needed on the Seat. While most of it was OK, the brakes were definitely not the way I wanted them; they have been converted from the original servo-assisted setup to a non-servo bias-adjustable setup with individual cylinders for the front and rear, plus of course the massive AP Racing front brake setup. While this sounds impressive, it wasn’t in practice – an immense amount of pedal pressure was needed, which meant there wasn’t a lot of control. They were powerful, but to get the power you needed to put the kind of effort usually only seen in a final of World’s Strongest Man. Not a good combination, really, and even on a short stage it was tiring. Doing an 11-mile forest stage would definitely be ‘interesting’.
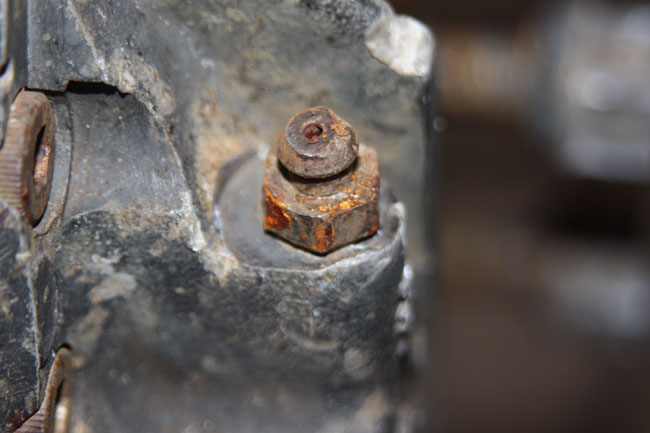
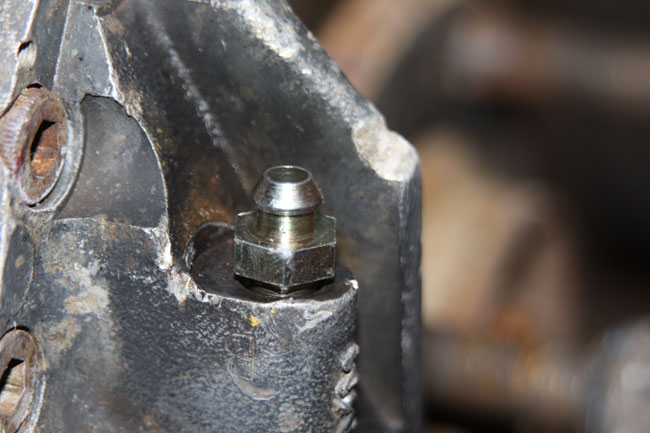
So, it was time to improve matters. First up was to remove any chance of a routine ‘service’ based issue giving these problems – while it was unlikely, it was worth checking anyway; so, it was time to change the brake fluid and bleed the entire system. The car had been laid up for a couple of years so the fluid needed changing anyway. With the old stuff syringed out of the master cylinders, a problem struck. The front brake calipers’ nipples were looking very worse for wear (a combo of having been mis-spannered and also beaten up with stones), and a couple didn’t want to come out.
Given that the calipers are £800 a side new, I didn’t want to mess things up, so bought an expensive wall-drive socket to give the best chance of removing them. And the £12 paid off, as they all came out OK. £4 then saw them all replaced! I’ve never understood saving money on things like this – it always comes back to bite you.
There’s a link pipe between the inner and outer parts of the caliper, and this was stone-damaged too, so that was replaced – another time I was glad I had a bunch of tools as making the brake pipe up took minutes to do. Then, bleed all the brakes, refit everything and go for a test drive.
Still terrible. However, in the meantime I’d done some reading about brakes, and found some very interesting info on the Stoptech website – in a very informative help sheet about such brake setups, it mentioned that the ‘pedal ratio’ of most standard setups was wrong when converting the system over as mine had been. The ‘ideal’ ratio is 6.2:1, so it was time to see if my setup was the same. I made some measurements, and found that mine wasn’t anywhere near – it was 4.3:1. This would mean that a LOT more effort would be needed to get the same pressure on the brakes, which made sense given the way the brakes felt.
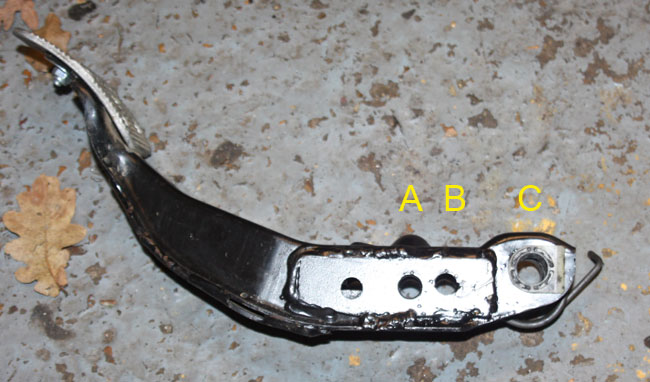
In short, out came the pedal, and it was then re-drilled to give a ratio of 6.2:1 by making the distance between the pivot and the brake pushrod 40mm instead of the previous 58mm.
The new hole is B, the old hole is A, and the pivot is C in the picture.
I put it on the car (without reinforcing it yet) to see how it went. Fortunately unlike other pedalboxes I’ve worked on before it’s fairly easy to do, and within 5 minutes I was out in the car, and it was transformed. Still needed a bit of a push when cold, but instantly felt much better; the payoff is more movement in the pedal, but it feels fine now – before it was horrible, and now I have some real control – it was easy to take the brakes to the edge of locking up.
To finish off, it needed to come off, and then have some strengthening done – there was a hole right next to the new one, originally, which needed welding up, plus the inside of the pedal was also only single-skinned so this was beefed up, painted and then refitted.
The errant starter motor was next, a quick grease of the appropriate bits freed it up – it’s not perfect (although it looks like new on the outside, it was clearly badly reconditioned!), but it works OK and doesn’t stick now.
The car is pretty much all set now, I just need to fit the bias adjuster, making up a new plate to mount it in, but that can be done tomorrow. One thing I did notice on the test drive is that it really does go well! The Sunseeker should be magic.
A cracking time…
by Darren on Dec.23, 2011, under Build, Seat
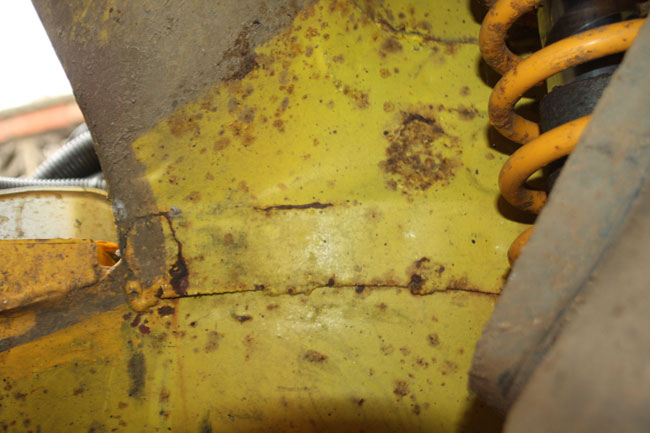
It’s been a few days, but a long few days, so I’ll start at the beginning. Last time out the Seat had the standard head re-fitted and everything in place for the first time since I bought it, and Monday morning meant enough time had passed to get the battery charged up, so it was time to see if it ran. Before the strip down the engine was running well, and indeed as soon as it was warm it would tick over like a real car. But it had been a long time, so I was pleased as punch when it fired up on the first turn of the key, and sounded sweet. Splendid. However, there were still some bits to re-fit – I’d not fully filled the coolant, or refitted the drivebelts for the alternator/water pump or the power steering, so these went on in short order and I fired it up and left it running; after a couple of minutes of throttle blipping it ticked over quite happily. The exhaust sounded quite different to when I bought it without a huge hole in it – it’s quite a quiet car. Or rather it would be, if there wasn’t a problem. When I bought the car, it came with a spare front pipe (which includes the cat). I nearly sold it at one point, and I was glad I’d not done so, as the flexible joint on the one on the car had split, so the car had that horrible sound when there’s an exhaust leak near the engine. Clearly that needed fixing, and it would have been better if I’d spotted it with the head off. I went to check on the disks which were being machined back to spec, but they weren’t done, and the weather turned, so that was the end of Monday. On Tuesday I had to work, but on Wednesday I went to pick up the brake discs (which still weren’t done), as I’d taken the bold step of booking the car in for an MOT on Friday. If you don’t set a deadline, then projects just go on and on, and it was time to get the Seat finished. I cleaned the discs up with wet and dry and they came up very well. I then fitted them to the mounting bells to find out the originals had been fitted wrong according to AP’s site, so that was nice! Cleaning them up, fitting them to the car and refitting the calipers and pads took up the whole morning, and just when I thought I’d finished, I noticed this:
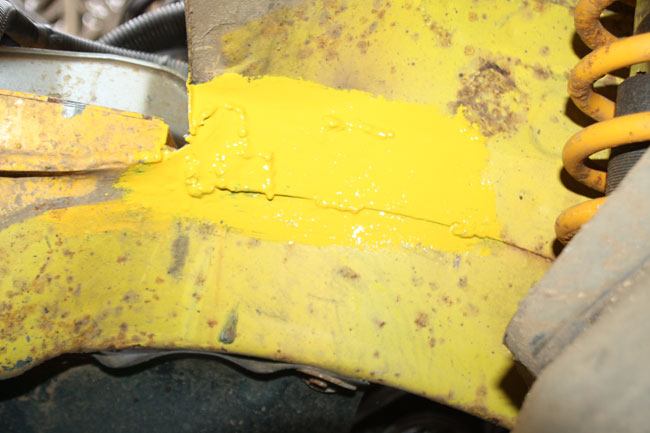
A couple of cracks in the inner wing. They were mostly the result of the metal being brittle where it had been seam welded, although there was one small patch that needed new metal as it had rusted. Not too bad to do, and half an hour later, it looked much better:
Much better and no problem for either MOT or actually driving the car. I took a precautionary look around the rest of the car but didn’t find anything else like it, so hopefully it was just a minor issue. After that it was time to fix the exhaust.
This was a complete pig of a job. Whoever designed the downpipe for the Ibiza (or rather the gap between the steering rack and the body) needs to be dispatched. What could have been a straightforward job was a complete pain to do as getting it out required a mixture of precision and strength which was incredibly difficult to manage with a car jacked up in my drive. I’m sure on a 4-poster it would have been downgraded to just “I hate this person, and the should suffer a lot”. I was eventually rewarded with a removed downpipe, and now I had to make one up. Eventually I took the path of putting the motorsport cat onto the new front pipe, which took a fair bit of grinding and cutting to get it off, but it was OK. Careful measurement and photography meant I could get the new part made up to the right dimensions (as there was a fair bit of play between the pipes), so I did a few test TIG welds and had to … refit the bloody thing to check it was OK. This was done, but again was hard getting it in, and harder getting it out. I fully welded it, and fitted it, and was relieved to find that it all fitted up without issue. And when the car started….. as quiet as a mouse, at the front anyway. This was a good thing, but the entire day was taken up!
Thursday was mostly taken up with collecting my Sister from Heathrow, but in the afternoon I changed the front tyres over to the MOT-legal winter tyres which were fitted to one set of tyres for the car, and then adjusting the handbrake cables and final fitting them, and fitting winter tyres. Once more play was stopped by bad weather and it being pitch black. Just time for a quick first test drive. The first thing that hit me was that the clutch is heavy and bites rather viciously. The second was nearly a roundabout – the steering is just 2 turns from lock to lock, and as a result I rather over-did it when I went round a roundabout, but fortunately corrected in time! The third was that the brakes needed a good push to work well, but other than that it was OK. A couple of runs up and down the road, and then I noticed the water temperature was getting a bit high, so I went back home, and found steam coming from under the bonnet! Not good, and a bit of a surprise as it hadn’t done it when run up to temperature before, but there you go. It was quickly traced to a not-fully-tightened jubilee clip, and I hoped that no damage had been done – the car didn’t get too hot, thankfully; the joys of proper instrumentation (the car has oil pressure and temperature as well as water temperature, and I think the Skoda should follow suit at some point).
So, today was MOT day, but in the night (as you do) I’d remembered a couple of things I’d not tightened up – just the lambda sensor and coilpack so easy enough – and also needed to sort the wipers out (which cleaned up OK), fit an interior mirror and fit new sill stand guards. Once more it was raining, but an hour saw all these done, along with the water topped up. Another test drive showed that all was well.
I hate MOTs. They are like scrutineering, but even worse. And as I’d booked it for 2:30 I had a fair bit of waiting about to do, which didn’t help. But it all went OK. There were a few advisories on it, nothing serious, and a PASS! So the Seat is finally ready to drive. Driving it back I took a few chances to give it some beans, and it goes OK. The brakes still need a firm push, but I’m hoping they are just bedding in at the moment (although they are non-servo) – they certainly stop OK, and warm up as well. The hydraulic handbrake is excellent, and the raised gear lever is really good – no more dipping out of sight to change gear, it looks more like one of the early manual-change Focus WRC cars (although obviously isn’t sequential!). It didn’t miss a beat on the way there or back, and that’s all I can ask for really. So it looks like a car change for Longmoor will be in order. How splendid. All I need to do is put the sumpguard on, get some tyres changed over and give it an oil change. But that can wait until next week; I’ve not had a moment to myself this week, so I’m going to enjoy Christmas for a few days instead. Happy Christmas to you if you’re reading this before the day, and even if you’re not, in retrospect.
