Is anything simple?
by Darren on Sep.07, 2007, under Build
Changing handbrake cables is usually a pig of a job, ‘cos it involves removing both sets of rear shoes to do it. Handily, this wasn’t the case with the Felicia – it’s possible to unhook the cable by moving the lever inside the hub forwards, and there’s enough spare (due to having separate cables) to get the new ones in. It was looking like a good evening….
… and then I changed the wheel bearings. Left side one – piece of cake again, a near-perfect job. Looked and worked perfectly. And then I did the right-hand side one, and for no apparent reason it binds when adjusted up. I’ve checked everything I can think of (and this was quite a lot) and it won’t adjust up properly. I think it must be a defective bearing, so I’ve ordered another one and will have to wait until Monday for that.
On the upside, I’ve bought a spray gun and ordered all the paint to do the car inside, engine bay and the bumpers as well. Hopefully next Sunday it might look a bit more like a rally car and less like some abandoned project. Tomorrow I’ll finish off the welding and start prepping the interior for paint.
Oh, and the pistons still haven’t turned up.
And Chris Bennett still owes me a gearbox, diff and ?800.
.. and a little more!
by Darren on Sep.03, 2007, under Build
So, it’s been back to work today, which obviously hampers the build somewhat. Regs for WRGB were supposed to be coming out on the 26th, but they’ve altered it back to the 5th again, so I think I’ll have to wait a couple of weeks (at least until the shell is painted and rolling with the rally suspension and brakes on) before entering.
But this evening I’ve finished off the rest of the welding on the floor and started doing the strut brace mounts… when the welder broke! Well, it mis-fed the wire inside itself, and it was pure luck it didn’t touch anything live and blow up! It’s fixed now, but it was getting cold and I had a few twinges so discretion said call it a night! I’ve got a large shopping list to buy tomorrow so I’ll crack on with all of that, plus hopefully get the strut brace mounts done, and get the car back on its wheels.
Will it be ready in time? And will I bet ?1500 on the outcome of that question? Wait and see!
…. and he’s back (pun intended)
by Darren on Sep.01, 2007, under Build
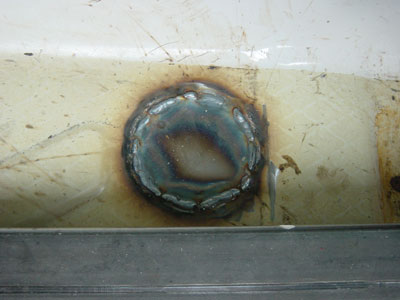
Well, for once there’s good news. It’s good news that is still bad, but there you go. The back issue hasn’t taken anywhere near as long as usual to improve – normally i’ll be done for a couple of weeks, but only 5 days later I’ve got back to welding the car, and finished off what I was doing, which was filling in the holes in the floor. Reason for this was that at WRGB last year, where we dented the floor, the plugs came out, and then the inside of the car was muddy as hell, which was a nightmare, and even got the WRC tracker of doom covered in mud, which is never a good thing.
So I’ve taken precautions this time, and welded up all the holes in the floor:
Not a huge amount of progress (still some cage welding to finish off, and the final tube to place), but it’s my birthday tomorrow so I’m going out tonight. I’d like to think that I’ll do something on the car tomorrow, but I doubt it. One thing’s for sure though, it won’t be up and running for the entry date. Damn.
Pete Tong, second set
by Darren on Aug.27, 2007, under Build
Back – done. Car – not done. Arse.
Well, nearly.
by Darren on Aug.25, 2007, under Build
So I’d planned to get the cage finished today. Mice and Men, etc. Reason being that firstly I didn’t get started until later than I planned, but mostly because there was a LOT of awkward welding to do on these tubes meaning muchola contortion, a lot of electrode re-grinding (if you touch the electrode in the weld pool you need to do this, and each time I need to wait for it to cool down before doing that), and also a bit of “I’m bored” also. Which meant that I started something else this afternoon instead – an “extra” (as if I have time), sill stand holes. This might seem OTT, but fitting these will mean I’ll be able to get a quick-lift jack for the car (and the jacking time is the biggest time-waster when changing a wheel) and not have a knackered underside as well. However, fitting them can be a bit of a hit-and-miss affair, reason being that you need to drill a large hole through the sill, which is 4 pieces of metal across around 150mm. I don’t have a drill big enough for this, or a hole-saw deep enough, so it needs to be accurately measured and then done from the inside and the outside. At the back this means being under the car, which isn’t too bad without the tank and exhaust there. And amazingly, I’ve done 3 and got them all within a mm of where they should be, which is good enough if you ask me. This might not look very pretty:
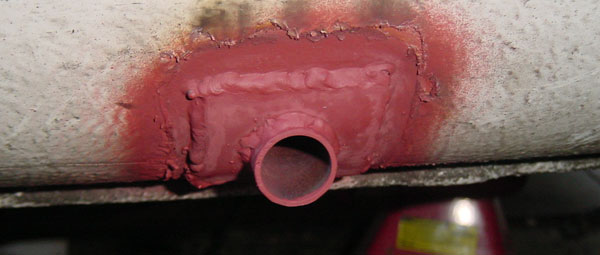
But it will do when it’s properly painted, and it’ll make a world of difference to working on the car.
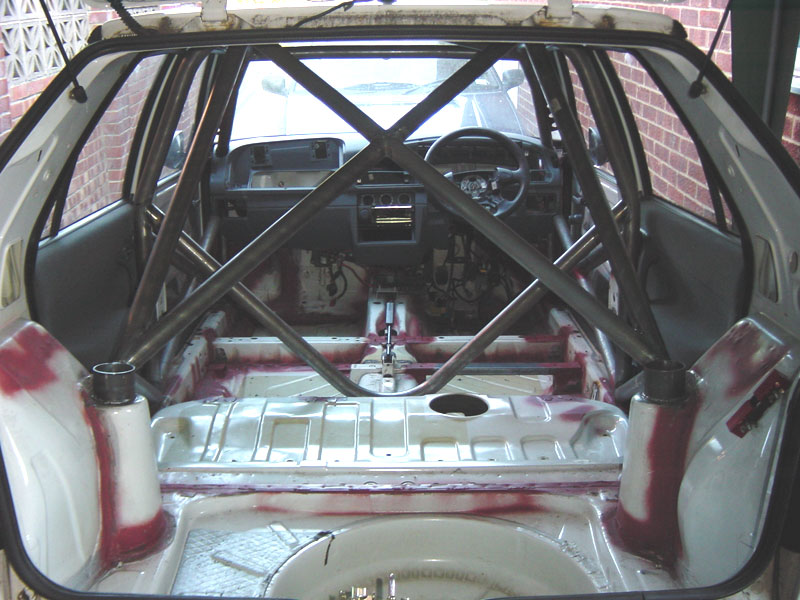
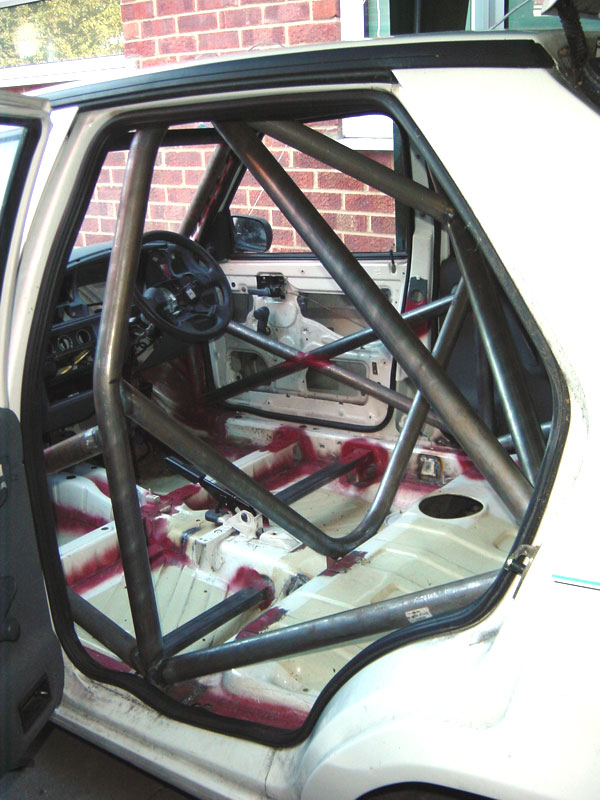
So the cage is nearly done – a few little bits to weld, and one more tube to place which is a piece of cake – just runs between the two strut towers at the rear. Shouldn’t take more than a couple of hours and it’ll be done. Pity the weather hasn’t been this good for weeks, I reckon I’d have a finished car stood there by now if it had! But here’s how it all stands…
Tomorrow, etc….
A turning point….
by Darren on Aug.23, 2007, under Build
…. is, er, turned.
What might not seem like a lot of progress was in fact a good day’s work. Firstly, fitting the tubes to the rear strut towers. Or more precisely, cutting them – this took about an hour to cut the two sections, and then they needed to be welded on. Because of the diameter of the tubes, they fitted well and also meant they could be seamed to the upper parts on the inside as well. Next up was fitting the lower rear braces which was fairly straightforward – just a simple cut at the bottom and then the same at the top, just opening them out to fit the large tube at the rear, and then welding them. Next up was the top rear braces, and these were more challenging, ‘cos the top tubes are slightly on a curve and the lower bits meet the rear brace bars at an angle, meaning that it took about an hour’s grinding to get a perfect fit on each side.
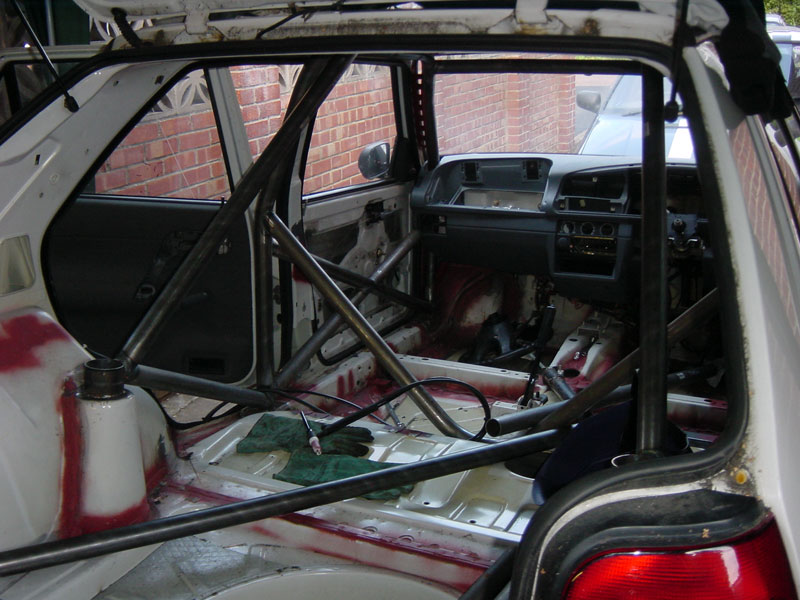
Or, in short, I’ve only fitted 6 pieces of metal to the car today. Which might not seem like much.
But….. there are only 4 pieces left to fit. And I’ve already made up the pattern for the most difficult cuts. I think the cage might be finished by Saturday afternoon….
The list grows…
by Darren on Aug.22, 2007, under Build
… and shrinks.
The only way I got the car ready for WRGB last year was by being a list-writer. Without sounding like an old git, having a list of things to do does two things – firstly, it means you have clearly-set tasks so you have an idea of what you should get done in a day and secondly you can actually plan for those tasks, meaning you don’t go to the shops 5 times.
So I’ve started list writing, and today’s tasks included removing the fuel tank, removing all the old fuel lines and brake lines, cutting the dash to fit round the rollcage, getting the seatbelt mounts fitted, boot hooks and some wiring work.
Apart from the wiring work, all done! First up was removing the tank, which involved pumping all the fuel out of it. Wish I’d done it when I got the car – there was nearly 10 gallons in there! It’s all orange and stale now, so no good apart for cleaning. Once that was done, the tank dropped out fairly quickly, and then all the pipes off, courtesy of the bolt cropper which handily seals the pipes as it goes, making the job a lot less messy.
Fitting the boot hooks was in the “make yourself feel better by making it look like a rally car” category. Half an hour well spent though, and this time I’ve put them the right way up, and also put plastic on the boot so it won’t wear through the paint quickly and make it rusty!
Cutting the dashboard wasn’t easy – the Felicia dash is actually an old-style Favorit dash (very square and angular) which has a new bit screwed to the top. As the cage is quite complex I decided to pull the curvy bit off and get the lower bit fitted first, and then hopefully make the top bit fit nicely with a curve round the cage tube. And about an hour later this had been done – the dash had to have a LOT of plastic taken out of it to fit round the cage tubes (the vents won’t be working again, alas), but no major mistakes were made. Which was nice.
Then, removing the remander of the soundproofing from the floor – this is nasty bitumen stuff, so the old petrol came in handy but it still took ages and was very messy.
Once the petrol had been allowed to dry, all the seatbelt mounts were welded in, again a much better solution than the last car’s jobs.
Again, this doesn’t sound like a huge amount, but there was an hour wasted getting bits in the morning, and another in the afternoon because Custom Cages won’t be able to supply the tube for the rear mounts “until at least the middle of next week”, and this information was only forthcoming when I phoned to check on the whereabouts of the missing parts. I’m still amazed that while the quality of the kit is beyond doubt, the service I’ve had has been crap. OK, I’m just some bloke who’s bought one of their cheapest kits, but if I treated my customers like this, I wouldn’t expect to be working. Fortunately an hour on the phone located some of the tube that I need for the mount, so I can actually make some progress over the bank holiday weekend, otherwise it would have been a complete stall. Now I just need to sort out getting the interior and the engine bay sprayed during next week, and WRGB might, just might happen. Maybe.
Something else gets done….
by Darren on Aug.21, 2007, under Build
So after 5 phone calls (!) I finally got to speak to someone at Custom Cages who told me that the rear mounts I’d seen in the pic are legal, and that the tube should have been in the kit! So I’ve been delayed for days because of this. Great. I measured up and let them know what was needed, but this was on Friday and still nothing has arrived. Another phone call or five will be needed tomorrow, clearly. G-reat.
However, unfazed I have carried on. The rest of the cage is now fitted and fully welded – door bars and all. And I’ve even made seat mounts for both seats now that I can place them properly – it wasn’t possible to do this before as the rear V-bar clearly limits the rearward and downward movement of the Nav’s seat, but now it’s in place, it was fairly easy to do, although a few problems (including what appeared to be a national shortage of 0.6 MIG wire) meant that it’s basically taken the whole day to do all of this.
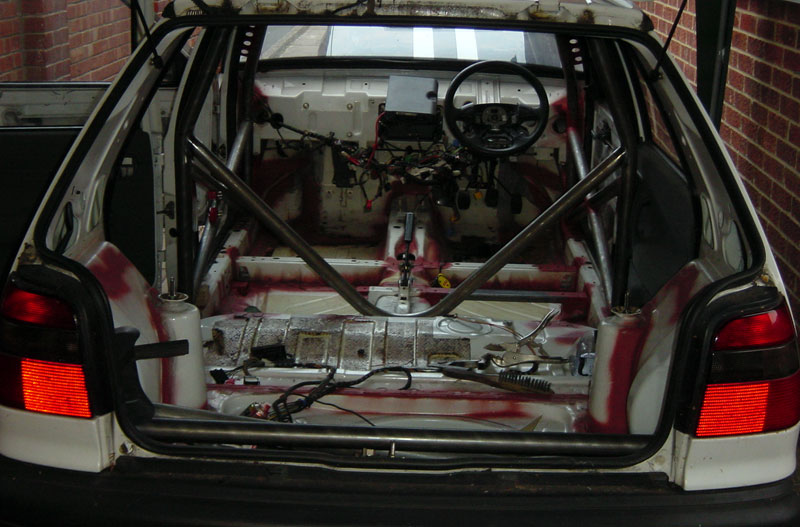
However, it now looks like a rally car, which is the first time this has happened. The seat mounts are particularly strong, being made from 50x25mm box, way stronger than anything I’ve had before, and it really shows, plus the welding is much better than any others I’ve done.
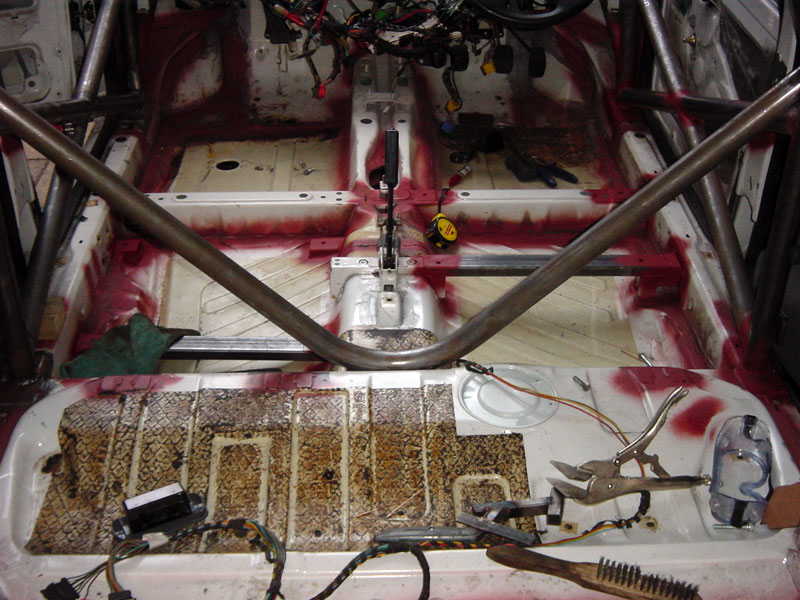
There have been other developments too – I’ve been shopping again, and bought all the metal I need for the footwells, for the tank guard, and the sump guard frame, plus fuel hose and ordered the other bits I need for much of the rest of the rebuild. A quick rack is on its way (hen’s teeth, dear boy, hen’s teeth), and I’m waiting for a quote for my self-designed sump guard which will remove the problems of the older one and be stronger too. There just seems to be so much to do and so little getting done each day!
Pete Tong puts in an appearance
by Darren on Aug.16, 2007, under Build
So far, it’s been going OK. Everything has been mocked up using cheap, thin tube before anything’s been cut, and that’s been good.
But the rear of the cage is the next bit to do, and the pictures I’ve been working to have a problem – the rear stay mountings aren’t FIA-compliant because they don’t offer a 60cm2 area of attachment to the bodyshell. To do this, the rear bar that goes between the two struts at the back needs to be lower than in the pictures. And therefore the tubes they’ve sent me (which have zero margin for error) are too short.
I’m waiting for a phone call back from Custom Cages at the mo, but needless to say I’m a bit crestfallen. I don’t think this will ever get done, let alone in time to enter WRGB.
… and there’s more!
by Darren on Aug.13, 2007, under Build
Well, I guess I got lucky today – apart from one shower the weather has been OK all day, so I thought I’d get on with what I can on the cage. First up are the door “X” bars, which I’d made patterns for out of the 44mm exhaust tubing I’d bought to rough things out. So I cut all 4, and trimmed them to fit, but the car’s position means only the drivers’ side is properly accessible, so I just welded those in fully, again the lack of a windscreen made it much easier.
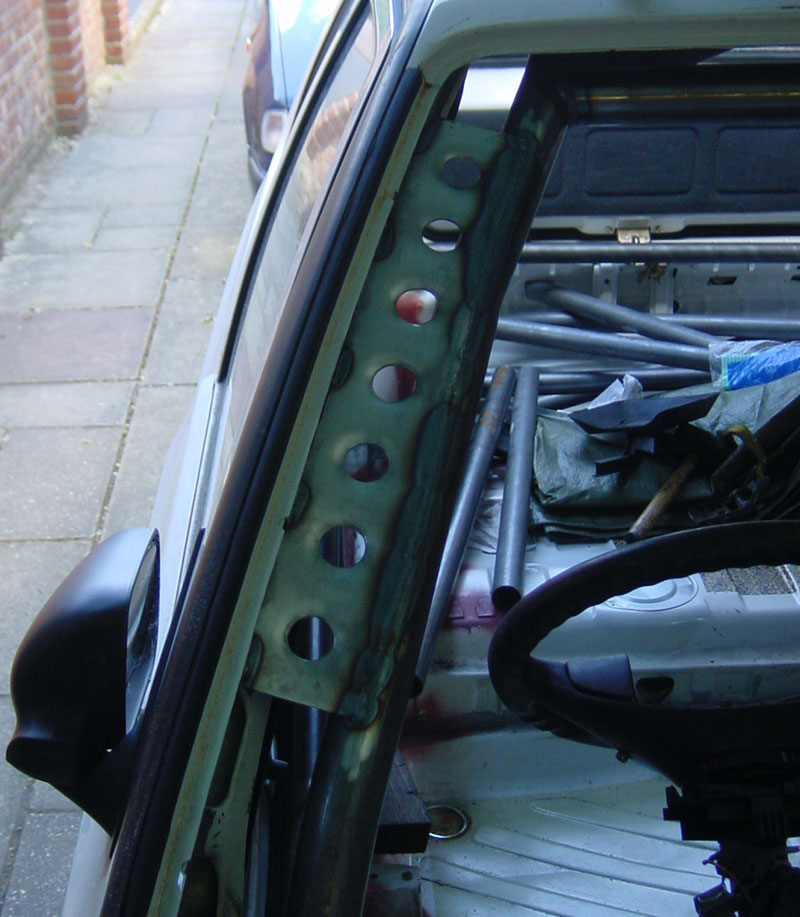
Next up, making some extras for the cage. Many cars have the cage braced to the shell – this is a good idea for the longevity of the shell, and also makes everything stronger in an accident, so I decided to make up some plates to go between the A-pillars and the cage. To make them look good they had to have holes put in them, and those holes need to be swaged (dented), making a much neater job, but meaning I needed to make up a tool to do a good job on them. However this meant they took a couple of hours to do, but they were well worth it once welded in – it looks like a much nicer job, apart from anything else!
Next up, there’s a V-shaped tube which goes behind the seats, and braces the tunnel, giving side-impact strength as well as strengthening the floor in an important place. However, here was the first “oh dear” moment of the whole fitting – now that the main hoop is not only welded in place, but braced by the door bars (which themselves are firmly welded to the B-pillars), it’s immovable. And I really should have put this part in before welding the rest of the cage in! Still, some (well, an hour’s) good trimming and planning followed by a bit of lateral thinking and some brawn has left the bar in the right place, with neatly trimmed ends. It’ll have to come out again to prep the areas for welding (one thing that is for sure with TIG is that correct preparation is vital – if the metal isn’t properly clean both mechanically and chemically, the weld is never 100%), but it’s in there, which at least means I can sleep tonight. So, at the end of day 3 (sort of), the cage looks like this:
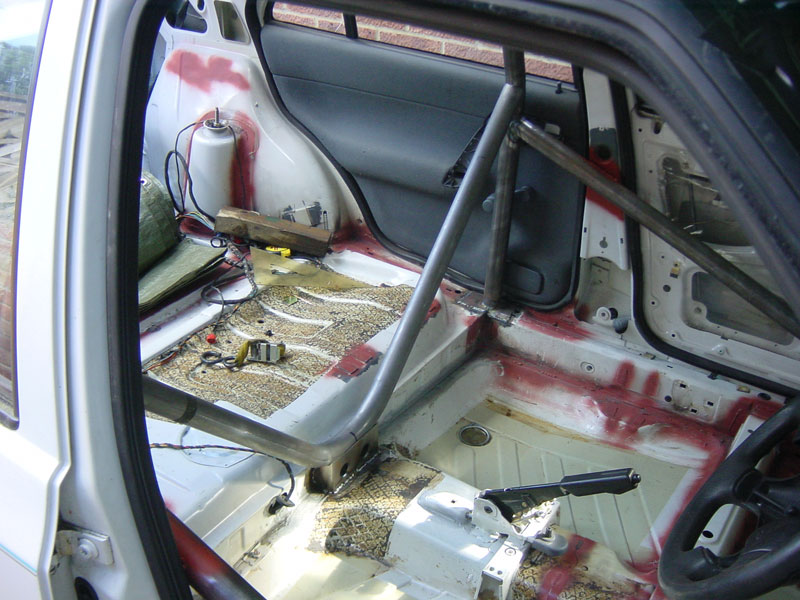
Apparently it’s going to chuck it down tomorrow, so there will be no progress, other than me going to buy the steel needed for the rear stay plates as Custom Cages omitted to include enough to make front and rear plates! On top of that, I’m going to order a bunch of stuff, including the new extinguisher system…

